NCEA Compatibility
Module: AS91879 - Develop a digital outcome to manage data
Requirements: using appropriate tools and techniques to query and present data for a purpose and end user
Relevant Implications: aesthetics
Go to top
Module: AS91879 - Develop a digital outcome to manage data
Requirements: using appropriate tools and techniques to query and present data for a purpose and end user
Relevant Implications: aesthetics
Go to topOn completion of this chapter you will know:
A form is a device for looking at the records of a table, one record at a time. This has a number of advantages. Firstly we are not distracted by data in the records before or after the one we are looking at. Secondly we may not be interested in looking at all of the fields of the record – only at certain ones. If this is the case then we can ensure that only the fields we want to look at are displayed on the form.
There are two ways of creating forms: manually or by using a wizard. The wizard is very quick and also very easy to use and learn. It also has a problem in that it will create a form that will do 90% of what you want to do, but in order to get the form to do the other 10% you must be able to manually tweak the controls. For this reason we shall look at creating form both using the wizard and also manually.
Go to topTo start the form wizard click on the Create tab and in the Forms group click on Form Wizard. This will start the first step of the Form Wizard which is shown below in Fig 1

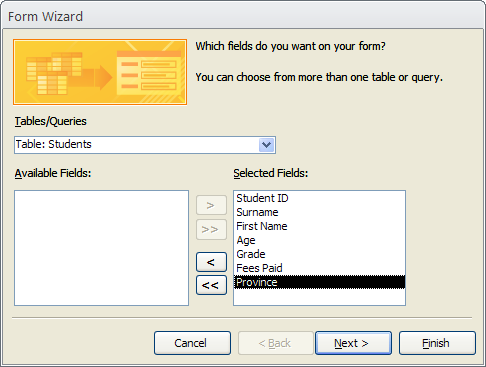
Our first task is to select the table or query that the form is to be based on. As we have only one table at the moment called Students we select that table from the combo box labeled Tables/Queries. Once we do this the names of the fields in that table appears in the box labeled Available Fields. Between this box and the box labeled Selected Fields are two buttons, one with a single arrow and another with a double arrow. The two boxes and the two buttons help us to select the fields from the table we want in our form. If we click the single arrow button then the selected field in Available Fields will be sent across to the box Selected Fields. If we click on the double arrow button then all of the fields in Available Fields will be sent across to the Selected Fields box as shown below in Fig 2
Once we have all of the fields we want on our form in the box Selected Fields we click on Next. This brings us to the next step of the wizard shown in the left panel of Fig‑3 below.
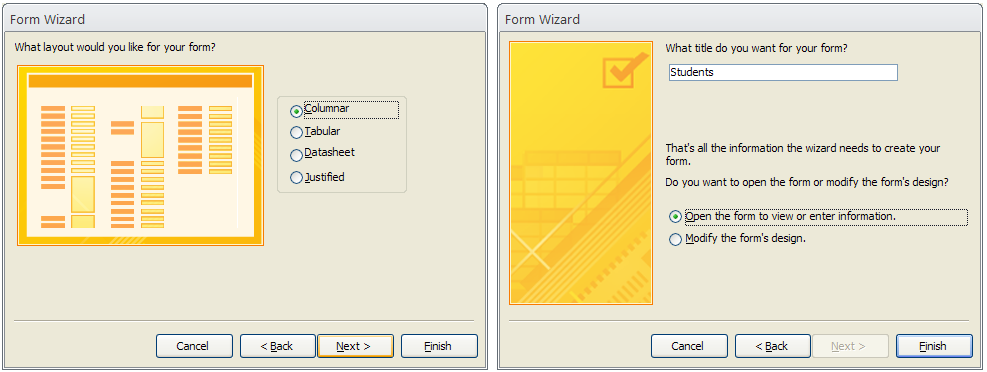
Both the left and the right panels above are parts of the wizard where we select the layout and style of our forms. As a beginner simply leave the default offered to us in both cases and click on Next.
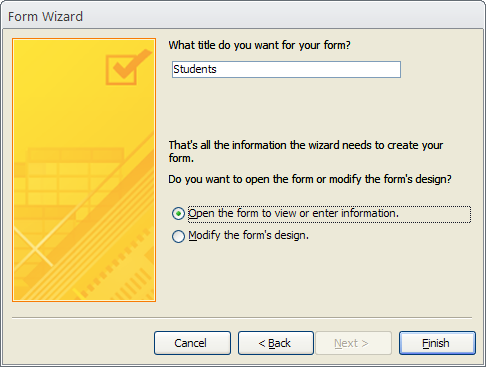
After we click Next on the styles stage we come to the final stage of the wizard above. Here we select a name for our form and then click on Finish. This will now bring up our form as shown in Fig‑5.
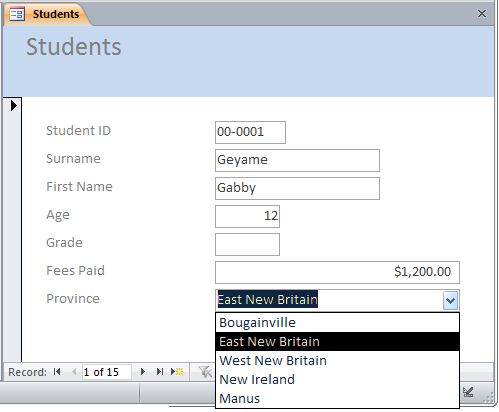
Here we see that all of the fields in the table have a corresponding text box on the form and that the names of the fields have become captions for the text boxes. Also notice that the Province field is represented by a combo box instead of a text box. This is because the wizard picked up the fact that this field has a lookup for its values. Consequently the wizard put a combo box in the form and added the values in the lookup’s value list to it. Here the combo box is opened, showing the other possible values for the field Province.
Go to topCreating a blank form is very similar to creating a blank table. We simply go to the Create tab and from the Forms group click on Blank Form. This gives us a display as shown in Fig‑6.
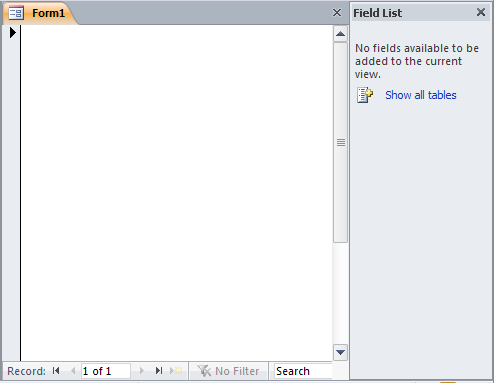
As well as the form a panel appears to the right of it with an icon labeled Show all tables. If we click on this icon it displays a list of the database tables and their fields as shown in Fig‑7. As we have only one table that is all that is showing here along with its fields.
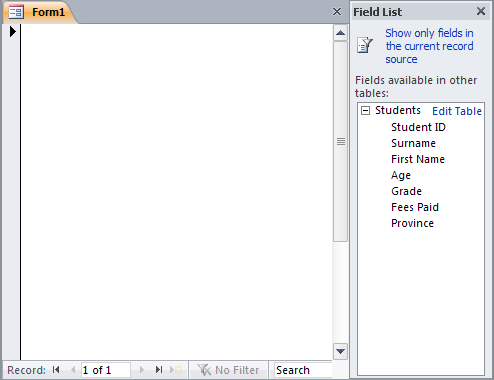
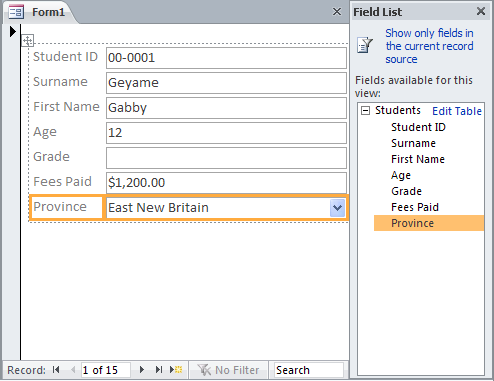
In order to add fields to the form we simply drag the names of the fields we want across to the form. In this case there is no need to switch between Design and Form views as the form stays permanently in Form view and the value of the fields are instantly available once the field has been dragged across to the form.
As well as displaying the fields of a table a form can also be used to display data that does not exist in the table but is calculated from that data. Here we shall use two examples of data that is calculated from existing data. Firstly we shall add a textbox to the form that will calculate the amount owning by a student. This will be calculated by subtracting the value in Fees Paid from 1200. Secondly we shall have another text box which will show “Paid in Full” if the value in Fees Paid is 1200, otherwise it will show “Money Owing”.
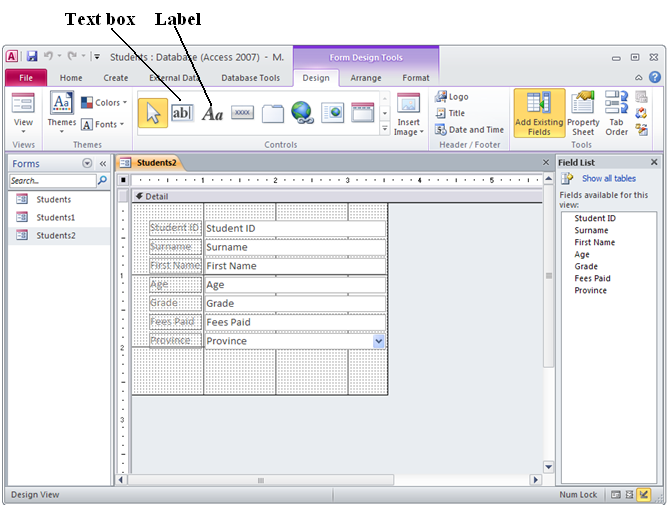
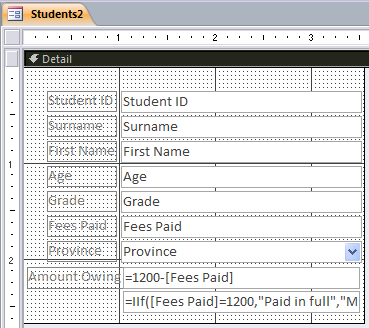
To begin with we must have the form in Design View. To do this we right click on the form’s tab and from the pop up menu select Design View. This will give a display as in Fig‑9 above. Notice that once we change into the Design View of a form that the tabs for form design appear. From the Design tab we select the text box tool and with it draw a textbox beneath the combo box for Province. Access automatically creates a label to go with the textbox. In the label we simply enter “Amount owing”. In the textbox, which initially is showing Unbound, we enter a formula for calculating the amount owing i.e. =1200 – [Fees Paid]. This simply means to subtract the value in the textbox Fees Paid from 1200.
For our text comment we draw another text box. In this case we can delete the accompanying label. In the new textbox we enter an IIF function. This will be =IIF([Fees Paid]=1200,”Paid in Full”,”Money owing”).
The general format of the IIF function is =IF(condition,true,false)
Condition refers to a statement whose value can be either true or false.
True refers to what we do if the condition is true.
False refers to what we do if the condition is false.
In the real formula [Fees Paid]=1200 is the condition. This may be either true or false. Thus if the value in the field Fees Paid is 1200 then [Fees Paid]=1200 will be true. On the other hand if the value in the field Fees Paid is not 1200 then the condition [Fees Paid]=1200 will be false.
“Paid in Full” is the true part of the function. This is what is displayed in the textbox if the value of the condition is true or in other words if the value in the field Fees Paid is 1200.
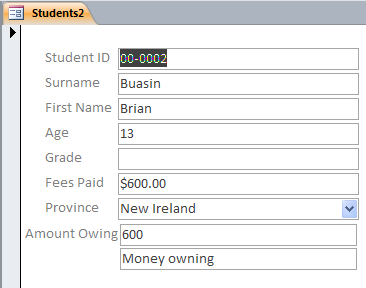
“Money owing” is the false part of the function. This is what is displayed in the textbox if the value of the condition is false or in other words if the value in the field Fees Paid is not 1200. Fig‑10 below shows the two textboxes with their formulae. This of course is in Design View. Fig‑11 shows the same form in Form View, where instead of seeing the formulae we see the result of their calculation.
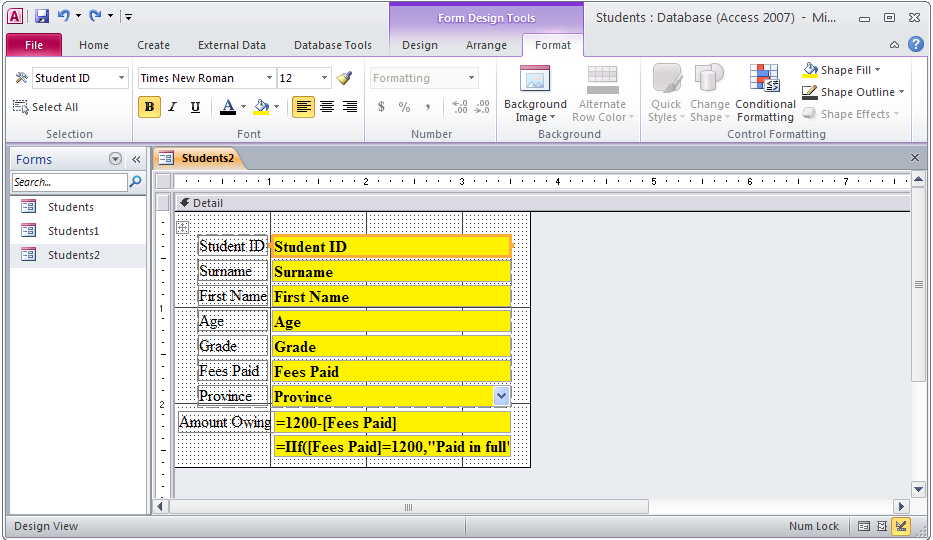
To finish off our form we shall add some formatting to its controls. Again we must be in Design View. Once we are here the Form Design Tools tabs become visible as shown below. In this instance we select the Format tab. The first set of formatting is to apply to all of the text boxes on the form. The font and size of the text is to be changed to Times New Roman, size 12, bold. The font colour is to be black. The background is to be yellow. To do this we select those text boxes. Next we select the Format tab and in the Font group select the font name and size. We select the Bold icon. In the font colour icon we select black from its drop down list. Similarly we select yellow from the drop down list of the background colour icon.
For the labels we format the text to Times New Roman, size 12, normal.
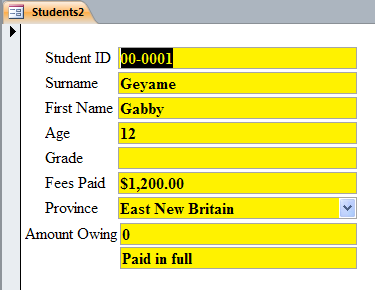
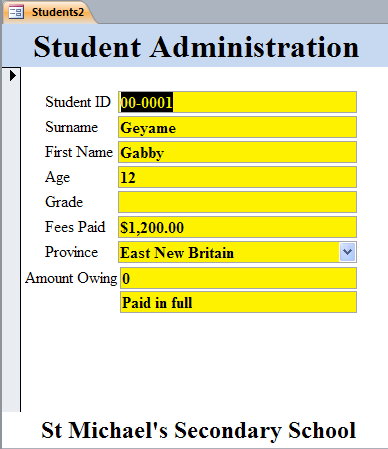
Fig‑12 below shows us how our form will look in Design View while Fig‑13 shows us the form in Form View. In clarity this is a great improvement on that shown in Fig‑11.
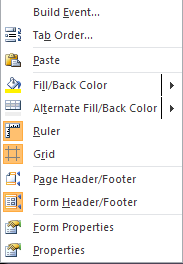
Headers and footers on forms are similar to those in word processing. Their purpose is to display general data that does not fit into the area of the main form itself. Both header and footer can be turned on or off by ensuring that we are in Design View and then right clicking on the form itself. This brings up the pop up menu shown below. Clicking on Form Header/Footer puts extra space at the top and bottom of the form which are labeled Form Header and Form Footer.

Above we have inserted a label in both the header and footer, with the purpose of the form in the top label and the name of the school in the bottom label. In Fig‑16 below we see the altered form in Form View.
A form is a device for presenting the contents of a table one record at a time. It has two main views – Design View and Form View. In the Design View we specify which table the form is to be linked to, what fields the controls of the form were to be linked to and what type of controls we would be using. We specify which table the form is to be linked to by using the Record Source property of the form. Once this property has been changed to the name of a table, Access automatically provides us with a list of the table’s fields. All we need to do is to drag the names of the fields onto the form and the system automatically creates a text box and links that text box to the field. If we wish to use List boxes or Combo boxes, wizards will automatically guide us through the steps of setting up those controls so that they display a list of values and that they are connected to a field in a table.
Go to topCreate a form for the table you created in Exercise 2. The controls for the fields will be text boxes apart from the fields Publisher, Topic and Status.
The control for the field Publisher will be a combo box. Its drop down list will have the values “Penguin”, “Pelican”, “Puffin”, “Macmillan”, “Hodder & Stoughton”, “Oxford University Press” and “Allen & Unwin”.
The control for the field Topic will also be a combo box and its drop down list will have “Literature”, “History”, “Geography”, “Science”, “Education”. The control for the field Status will be a list box that will have values “On shelf”, “On Loan” and “Missing”
Click here to view assignment for the database module Go to top