Learning Outcomes
On completion of this page you will know how to control the width of a box object using border, padding and margin
Go to top
On completion of this page you will know how to control the width of a box object using border, padding and margin
Go to topHave you had the experience of marking up a container element 800 pixels wide and trying to float two elements inside it 400 pixels wide? The chances are that they will not float but will instead lay themselves out one above the other.
The chances are that you have added either padding or a border to the two elements that you tried to float. In this short section we shall look at how both padding, borders and margins influence the space taken up by an element.
For controlling widths of elements, HTML has a variable box-sizing. This can have one of two values: content-box or border-box. Of those two values content-box is the default value. For this reason, if no box-sizing value is specified, the system defaults to content-box. More than likely this is the reason why many people have not heard of box-sizing in the first place.
Go to topThe content-box is the default styling of HTML for styling any element that hax a width and height property.
If an element is styled as being 400 pixels wide, then its width will always be 400 pixels wide unless it is restyled using CSS. If a padding of 20 pixels is added to the element then that padding will extend on all sides of the element, thus makeing the element take up a width of 440 pixels, 20 pixels on each side.
If a border of 10 pixel thickness is now added then that border will extend away from the padding, making the element take up a width of 460 pixels. These concepts are illustrated below.
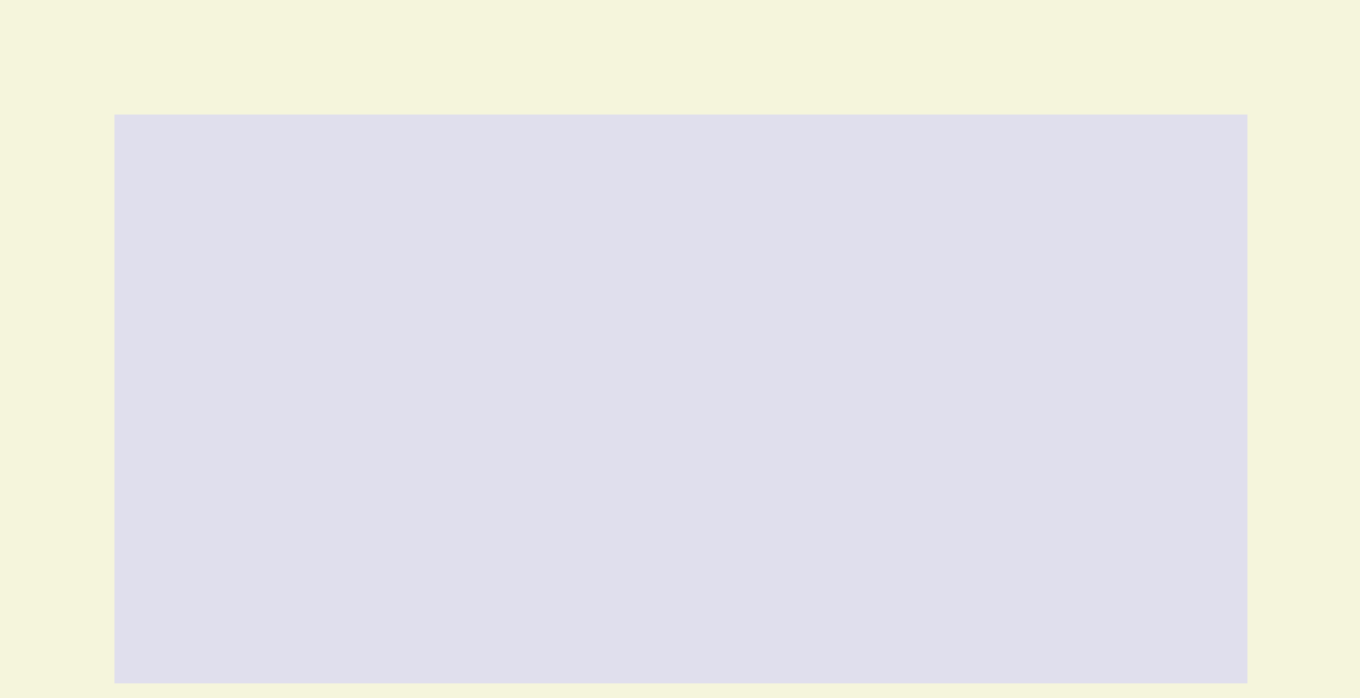
Fig 1 shows the content box. If this were a container for text then the text would extend its entire width and height
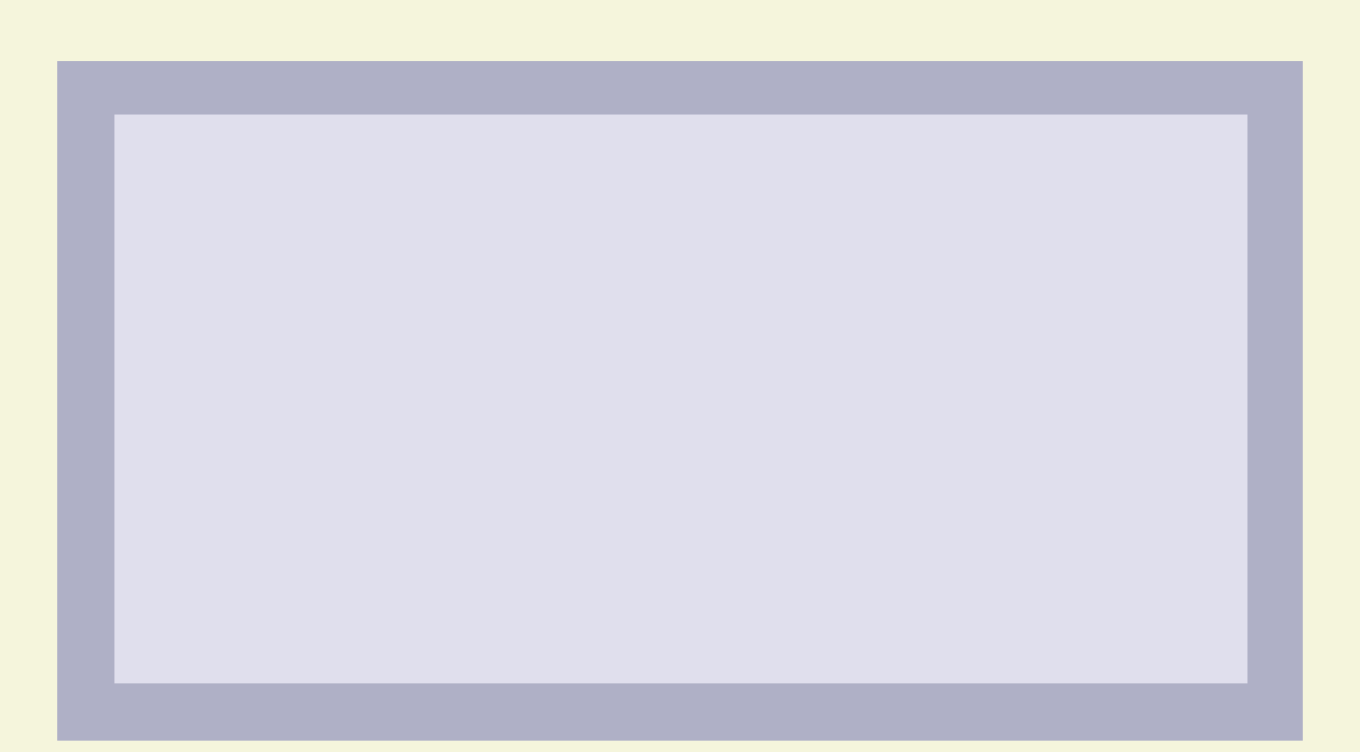
This is the same content box as in Fig 1 except that padding has been added.
Notice that the padding extends beyond the content area, while the content area remains the same width and height as before. A different colour is applied to the padding area solely to make it visually distinguishable from the content area. In a real web page the two would be the same colour.
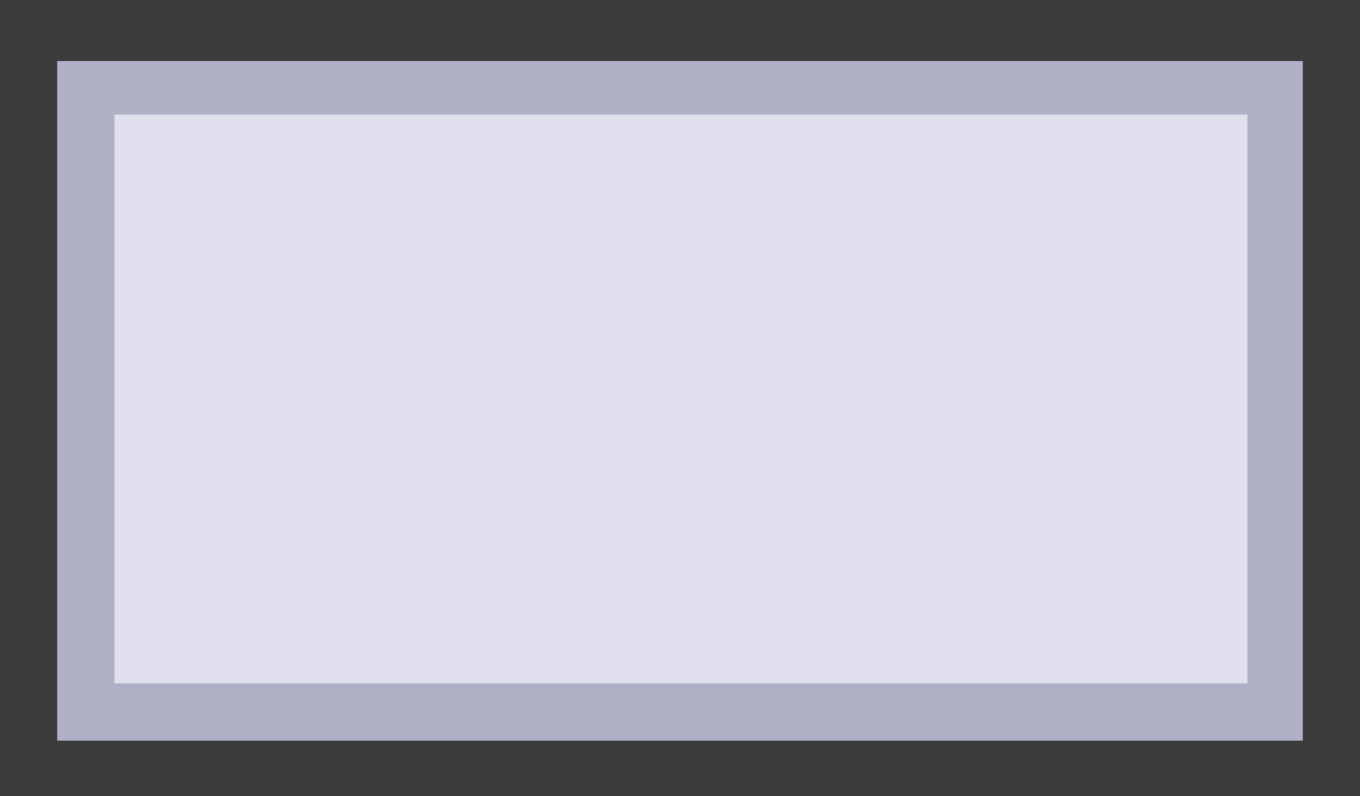
Here in the third version the border extends beyond the padding area, thus adding twice its own width to the total width and height of the area taken up by the content and padding.
Go to topTo demonstrate how the above ideas are implemented using HTML and CSS we shall mark up a div element that will be 500 pixels wide filled with text. Next to it we shall markd up and identical element except that we shall add padding of 30 pixels to it. Finally we shall add a border with a width of 30 pixels to it.
The CSS code for styling those div elements is shown below.
                        h1{
                            text-align: center;
                        }
                        div{
                            width: 500px;
                            margin: 0 auto;
                            background-color: #444;
                            color: yellow;
                            font-weight: bold;
                        }

                        .addPadding{
                            padding: 30px;
                        }
                        .addBorder{
                            border: 30px solid blue;
                        }
Above the styling for our div boxes is specified. Line 5 specifies its width while line 6 specifies that it will be centered on the page.
The background colour is specified as dark grey at line 7 while the text colour is specified as yellow at line 8. This is because yellow text show very well against a dark grey background.
At line 9 the font weight is specified as bold. This is to enhance the yellow text.
                        <!DOCTYPE html>
                        <html lang="en">
                            <head>
                                <link href="box%20model.css" rel="stylesheet" type="text/css">
                                <title>Poetry</title>
                                <meta charset="utf-8">
                            </head>
                            <body>
                                <header>
                                    <h1>Lorem: standard box model</h1>
                                </header>
                                <main>
                                    <div>Lorem ipsum dolor sit amet, consectetur adipiscing elit, sed do eiusmod tempor incididunt ut labore et dolore magna aliqua. Condimentum id venenatis a condimentum vitae sapien pellentesque habitant morbi.</div>
                                    <div class="addPadding">Lorem ipsum dolor sit amet, consectetur adipiscing elit, sed do eiusmod tempor incididunt ut labore et dolore magna aliqua. Condimentum id venenatis a condimentum vitae sapien pellentesque habitant morbi.</div>
                                    <div class="addPadding addBorder">Lorem ipsum dolor sit amet, consectetur adipiscing elit, sed do eiusmod tempor incididunt ut labore et dolore magna aliqua. Condimentum id venenatis a condimentum vitae sapien pellentesque habitant morbi.</div>
                                </main>
                            </body>
                        </html>
Nothing new is introduced in Listing 2 above, apart from the contents of main, which spans lines 12 to 16.
At line 13 a div element is marked up. Since no classes is assigned to it, it will be marked up according to the specifications in lines 5 to 9 of Listing 1.
At line 14 another div is marked up. As well as the CSS code in Lines 5 to 9 of Listing 1 being aplied to it, it also has the class 'addPadding', also from Listing 1, added to it. The result of adding this class is that a padding of 30 pixels are added to the div element.
At line 15 a third div is marked up. This time the classes 'addPadding' and 'addBorder' are added. The result of this is that padding is added to it just like it's predecessor and a border is also added to it.
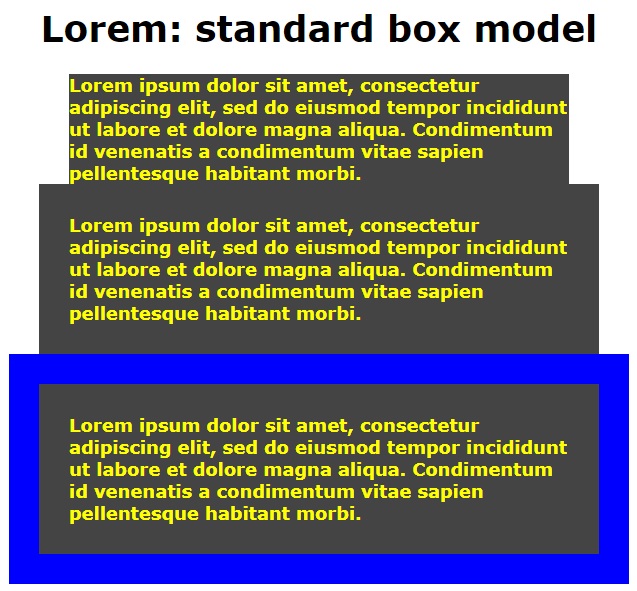
As we did not put a margin on the elements we created above they are all stacked on top of each other. (We shall deal with margins later on.)
In the first element we see that the text takes up the entire content area with no space between it and the bounding box on any of the borders.
In the second element we see that the text containing content box is still exactly the same size as its predecessor, but the padding has expanded the size it takes up on the page by 30 pixels on each side. Thus the width it takes up is now 560 pixels.
In the third element, its space on the page has been expanded on all four sides by a 30 pixel border, thus giving a width of 620 pixels.
Go to topFor this example we shall use the same HTML file as in Listing 2, while the CSS file is shown in Listing 3 below. This file too is almost identical to Listing 1, apart from one extra line inserted at line 5 of Listing 3. The line is shown in bold.
This line specifies that we are using a different model for sizing our box than in the previous example.
                        h1{
                            text-align: center;
                        }
                        div{
                            box-sizing: border-box;
                            width: 500px;
                            margin: 0 auto;
                            background-color: #444;
                            color: yellow;
                            font-weight: bold;
                        }
                        .addPadding{
                            padding: 30px;
                        }
                        .addBorder{
                            border: 30px solid blue;
                        }
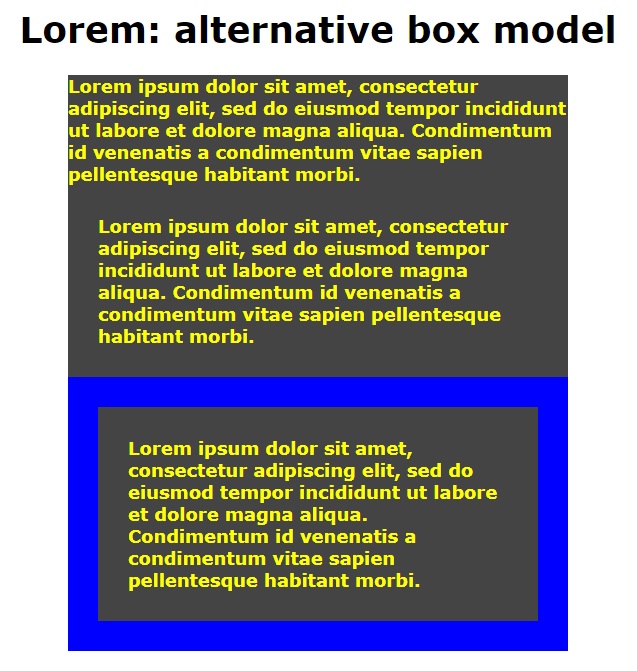
Comparing the CSS file with the image above, the orginal content box has a width of 500 pixels. When we check that against the image in Fig 4 we see that the text is laid out in exactly the same way in both.
Back to Fig 5, when we come to the second element where a padding of 30 pixels is added we see the difference between the content-box and border-box models. The overall width of the content-box is maintained and the border is assigned to the inside of it, instead of the outside. This means that the text area is reduced in width by 60 pixels hence we now have more lines of text.
Adding the border in the third element reduces the width of the text area further, resulting in even more lines of text.
Go to topA margin contributes to the amount of space an element takes up on a page just like padding and border do. A margin, however, behaves slightly differently than the other two properties: it is unaffected by the value of the box-sizing property. To look at this we have altered our CSS file again as shown below.
                        h1{
                            text-align: center;
                        }
                        div{
                            box-sizing: border-box;
                            width: 500px;
                            margin: 0 auto;
                            background-color: #444;
                            color: yellow;
                            font-weight: bold;
                            margin-top: 30px;
                            margin-bottom: 30px;
                        }
                        .addPadding{
                            padding: 30px;
                        }
                        .addBorder{
                            border: 30px solid blue;
                        }
Our most recent alteration is shown in lines 11 and 12 of Listing 4 above. It simply adds a 30 pixel border both above and below each element, as shown below.
From this we can see that margin is the only property of an element that extends the space taken up by that element when box-sizing has a value of border-box.
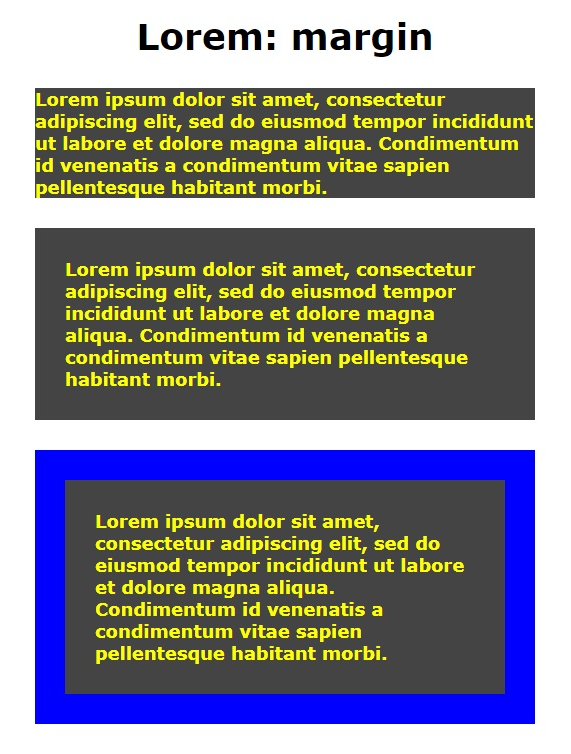
If line 5 of Listing 4 was changed to box-sizing: border-box; then we would get an output as in Fig 6 below.
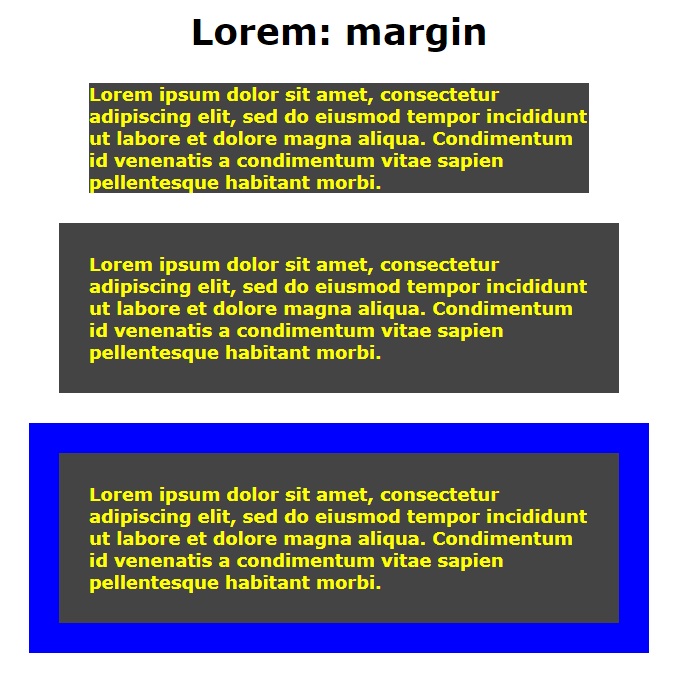
Here we see that when box-sizing changes to content-box the margin becomes simply one of the properties that extend the space taken up by an element on a page.
Go to topThe property box-sizing applies to all HTML elements that have a width and height property. It controls how those elements handle the properties border, padding and margin in relation to how much space they take up on the screen.
                        div{
                            width: 500px;
                            margin: 15px;
                            border: 12px black solid;
                            padding: 9px;
                        }
If the property box-sizing had a value of content-box then the screen space taken up by a div element styled using Listing 5 then the total width of that element would be container width + padding + border + margin or 500 + 9 + 12 + 15 = 536.
On the other hand, if the property box-sizing had a value of border-box then the screen space taken up by a div element styled using Listing 5 then the total width of that element would be container width + margin or 500 + 15 = 515. The values for border and padding would be deducted from the width property giving a reduced content area of 479.
Go to topFor this assignment, you are required to demonstrate your understanding of the CSS Box Model concepts as explained in the provided content. You will need to write a floating narrative that reflects your comprehension of key topics, including the default content-box model, the alternative border-box model, and how properties such as padding, border, and margin influence the space taken up by an element.
Begin by summarizing the role of the box-sizing property in CSS. Explain its default value (content-box) and how it calculates the total width and height of an element by adding padding and borders to the content area. Include a discussion on how this model affects layout when elements are styled with specific widths and heights.
Next, describe the alternative border-box model. Detail how it differs from the content-box model by including padding and border within the specified width and height of the element, thereby changing how the content area is calculated. Compare the practical implications of using content-box versus border-box in responsive web design.
As part of your narrative, discuss the importance of margins in CSS. Highlight how margins contribute to the space an element occupies on a page and how they behave consistently, regardless of the box-sizing model in use. Provide examples to illustrate your points, referencing both vertical and horizontal margins.
Conclude your narrative by summarizing the impact of the box-sizing property on web design and layout planning. Reflect on scenarios where you might prefer one model over the other and why understanding these concepts is crucial for creating well-structured and visually appealing web pages.
Your submission should demonstrate clarity of thought and thorough understanding of the CSS Box Model. While you are not required to write actual HTML/CSS code for this assignment, feel free to describe code snippets as part of your explanation to reinforce your understanding.
Go to top