A form is a device for looking at the records of a table, one record at a time. This has a number of advantages. Firstly we are not distracted by data in the records before or after the one we are looking at. Secondly we may not be interested in looking at all of the fields of the record – only at certain ones. If this is the case then we can ensure that only the fields we want to look at are displayed on the form.
Although Access provides a number of ways to create a form we shall look at only one way which has three steps involved:
Create a blank form
Associate the form with a table
Create objects on the form and associate each object with one of the fields in the associated table.
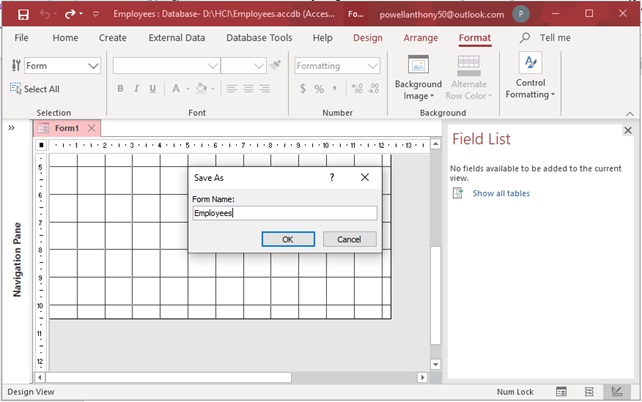
Creating a blank form is similar to creating a blank table. We go to the Create panel and in the Forms tab click on Blank Form. This gives us a form like that shown below in Fig 1.
The form is labelled Form1. Since we are going to use this form to interface with the Employees table we shall name the form Employees as well.
Fig 1
To rename the form we right click on the form tab and fron the pop up menu select Save. This gives us the dialogue box shown in Figure 1. Here we enter the name of the form and then click OK.
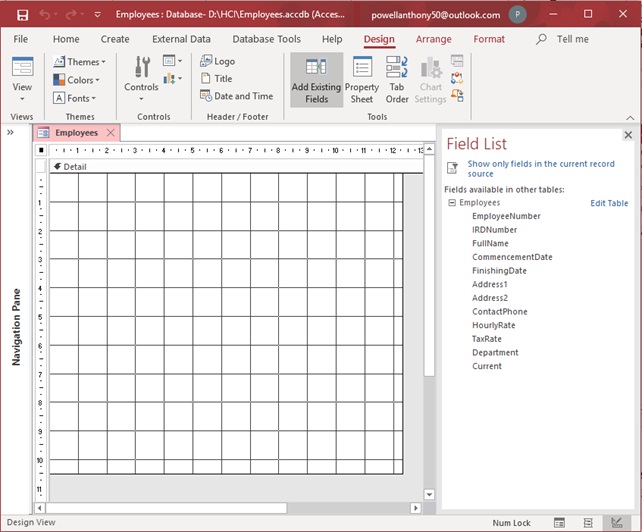
We need to associate our new form with the Employees table. To do this we go to the Design tab and click on Add Existing Fields. This shows a new panel on the right hand side of the window titled Field List. Below it is a link titled Show all tables. Clicking on this link displays all of the tables in our database – which is only one in our case. Next to the table name is an expansion button. Once we click on this we get the full list of fields in our table as shown in Fig 2.
Associating the form’s controls with a table's fields
Fig 3
Associating a form’s control with a table is very easy; you simply drag the field name from the Field List panel in Figure 2 above over to the form area as shown in Figure 3.
Two things to notice about this: neither of the fields Finishing Date or Current were copied over. The reason for this is that those two fields would be irrelevant to data entry for a new employee and therefore not applicable to our current form. The other is that, at first glance, all fields appear to have been copied twice. This is not the case, however. If you look closely you will see that the controls in the left-hand column have spaces where the field name has more than one word, while the controls in the right hand column have Camel Script. This means that the controls in the left-hand column are simply labels that indicate which field of the underlying table the text boxes to the right are linked to. They display the Caption property of the fields.
The controls in the right column are, as stated, textboxes linked to the individual fields of the underlying table and currently are showing the Name properties of the fields that they are linked to.
Our form is currently complete enough that we can save it and go into Form View in order to view the data. To do this we first save the form and then right click on the form tab and from the pop up menu select Form view.
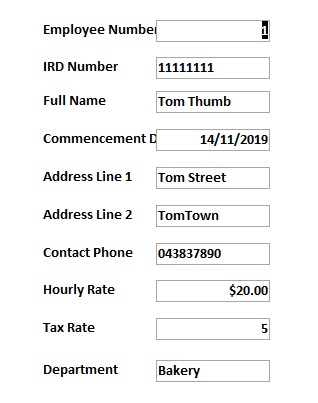
Fig 4
The form shown in Form view, indicates that the data is displayed instead of the field names
Forms can be seen as display boards on which either images or data can be displayed. Within databases they are used to present data from a table or a query in a way that is visually easy to read and interpret by the user.
Forms can be linked directly to a table or a query, and once that linking has occurred, the data in the fields of that table or query can be displayed on the form.