Learning Outcomes
On completion of this page you will be familiar with most of the building blocks that we shall use in order to mark up an accessible web page.

On completion of this page you will be familiar with most of the building blocks that we shall use in order to mark up an accessible web page.
In the previous page we learnt that text to speech was beneficial to the the visually impaired, the dyslexic and those on the autism spectrum. It cuts across all of the impairments we want to cater for in this course. Our aim, therefore, is to design web pages in such a way that screen readers can easily interpret the page's layout. When the screen readers can do this they can convey the structure of the page to the user. This in turn will give the user the ability to navigate to all parts of the page
As stated in the previous page we shall be using the WCAG guidelines regarding what facilities we shall provide in our pages to improve accessibility. Paradoxically the first guideline we shall use is one of the very last: Parsing[1].
Parsing has three aspects to it:
In the rest of the page we shall describe eight HTML features that we will use in our web pages and detail how they should be used in relation to each other. This will be further elaborated on when we look at coding the actual page.
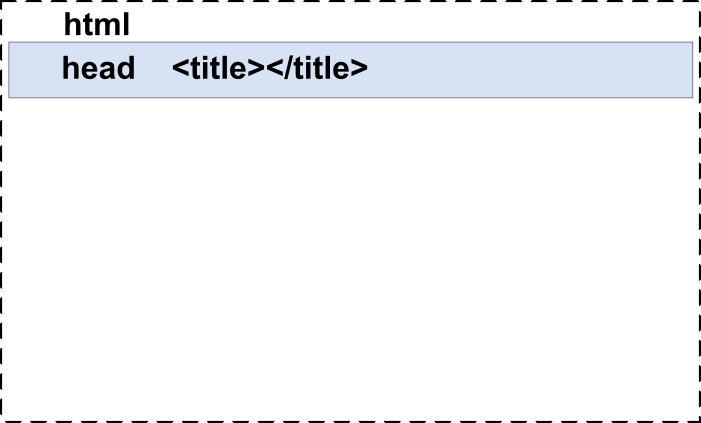
Go to topThis encapsulates the entire page's contents, both user readable and administrative. It is permitted two child elements: the <head> and the <body>[2].
We shall be setting two features of this tag that will influence the entire document. The first is the lang attribute. By setting this to "en" we are specifying that the language of the page is English.
Although of no great importance to sighted users, this is extremely important to blind users who depend on assistive technology in the form of a screen reader. By specifying that the language of the page is English the screen reader will open a file that will determine the correct pronunciation of the text according to standard English pronunciation.
The other feature we shall be setting is the font-size property. If we set this to "18px" then the standard font for the page will be fixed at 18 pixels. To improve the accessibility of our page, however, we need to allow the user to change the page's standard font themselves using their browser. In order to do that, we have to change the font-size to "100%". This means 100% of the font size specified by the browser. This allows those with low vision to change the browser's standard font size and the page's font size will change accordingly by being 100% of the browser's font size.
Go to topThis is the first element inside the <html> block. It contains administrative data which is processed by the system itself. This includes meta data and links to external resources such as stylesheets and JavaScript files[3].
The only human readable data in this block is what will be contained between the <title></title> tags. All other human readable data is in the <body> block.
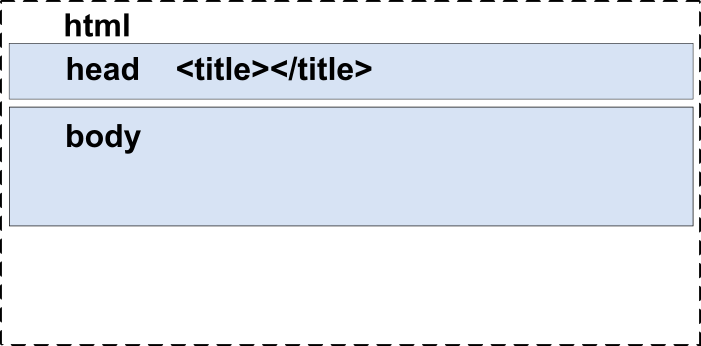
In an HTML document the <body> is the second element inside the <html> block. It contains everything that will be visible on your web page.
It must be the second child of the html element[4].
Technically we can enter anything we like directly into this element, including text, images, hyperlinks and anything else we wish. This, however, is not a good idea. Unless we structure our data properly our page will be difficult to maintain and will be impossible for screen readers to navigate.
Strictly speaking only three items should go into the <body> element:
Everything that is to be added to the page should go into one of those three elements. Now let us look at the three same elements and what should go into each one of them.
Go to top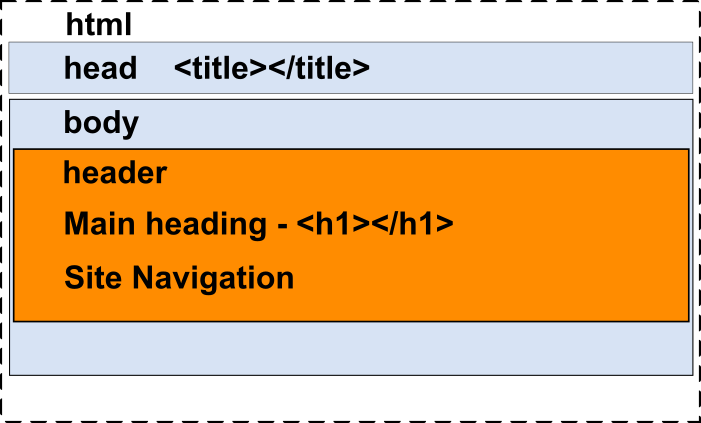
Obviously this will be the first element of the visible part of the page. In this case it is a child of the <body> tag. In this form it is a banner landmark that helps assistive technologies to identify key parts of the web page.
If you think of a web page as a book, then the data in the <header> corresponds to the front section of the book where the book's title, the copyright details and the table of contents of the book appear.
Using the book analogy the main heading i.e. the <h1> element corresponds to the title of the book. For a company or other organisations the <header> usually contains that organisation’s logo. If the current page is part of a larger web site then the <header> block also contains navigation links to other pages on the site. Those links will be contained within a <nav> element[5].
Go to top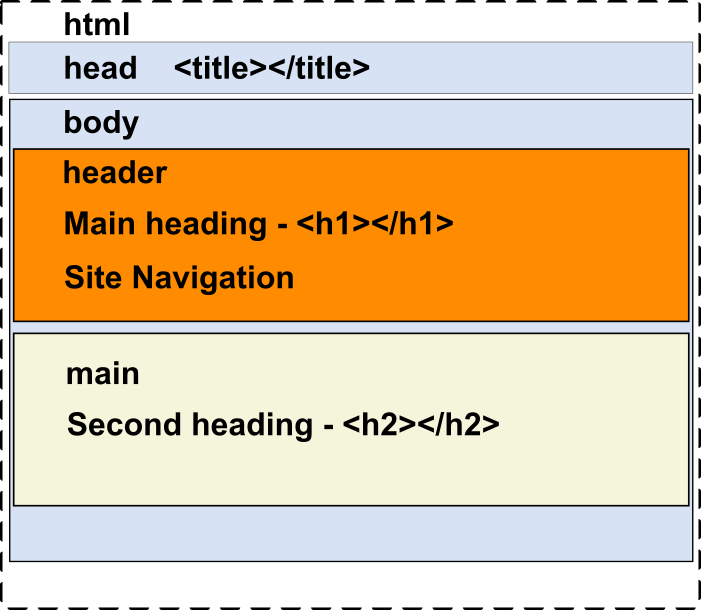
As its name implies, this is where the main contents of the page will be displayed. It is a landmark that allows users to skip large sections of the document. It is usually the secon child of the <body> block. You should have only one <main> element in any HTML document[6].
Like the <body>, we shall not be putting any text or images directly into <main>. Instead we shall be putting them into one or more of the following:

Obviously the name of this tag derives from the word 'navigation' or finding your way around. Its sole use is as container for a list of hyperlinks. If your web page is small and standalone then it may have no need for a <nav> element. This is rare, however.
If a page forms part of a web site then it will have a <nav> element placed within the <header> element. The hyperlinks within this element will connect to other pages on the same site.
If your page is fairly large with a number of topics and sub topics, then you will have a <nav> element at the start of <main>, as shown in the image above. As a child of the <main> element the <nav> performs the function of the table of contents for the page[7].
Go to top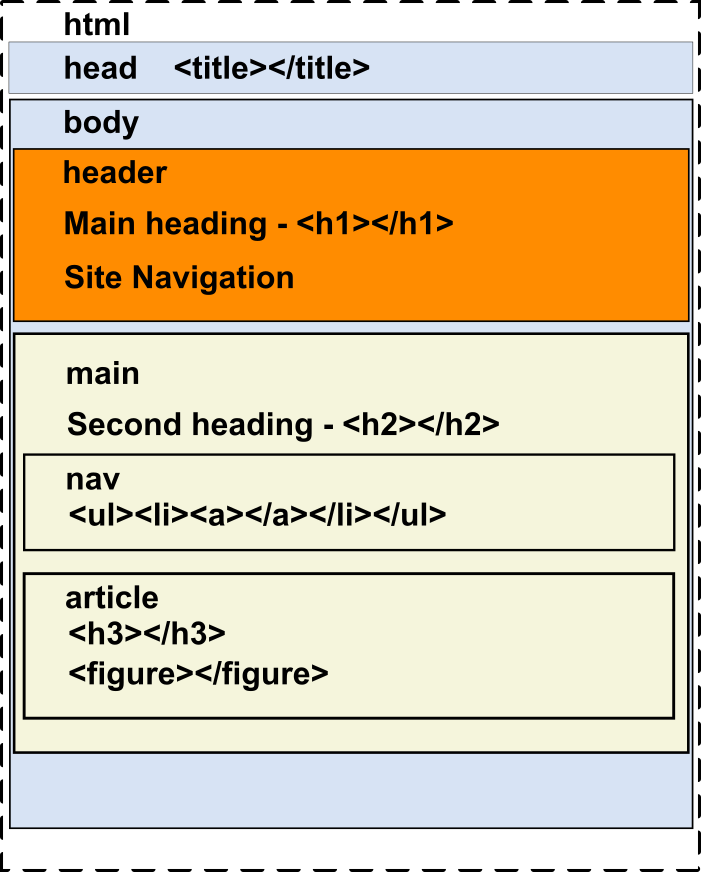
The <article> holds a self-contained text composition[8]. What a self contained text composition means depends on the subject of the page. In the site that we are building each single story would be placed inside an <article> element. In the case of the page you are now reading, the description of each element is contained within one <article> element.
As well as text we shall also be using images inside an <article> element to illustrate the story.
It is recommended that the first item in an <article> is a heading. In our case this would be <h3>
As the <article> element would hold a self contained block of text, users would need to be able to navigate to it. To facilitate this each <article> element should be given a unique id value.
Any number of <article> elements may be placed inside a <main> element.
Other tags like <section> and <aside> can be used inside an <article> block.
Go to top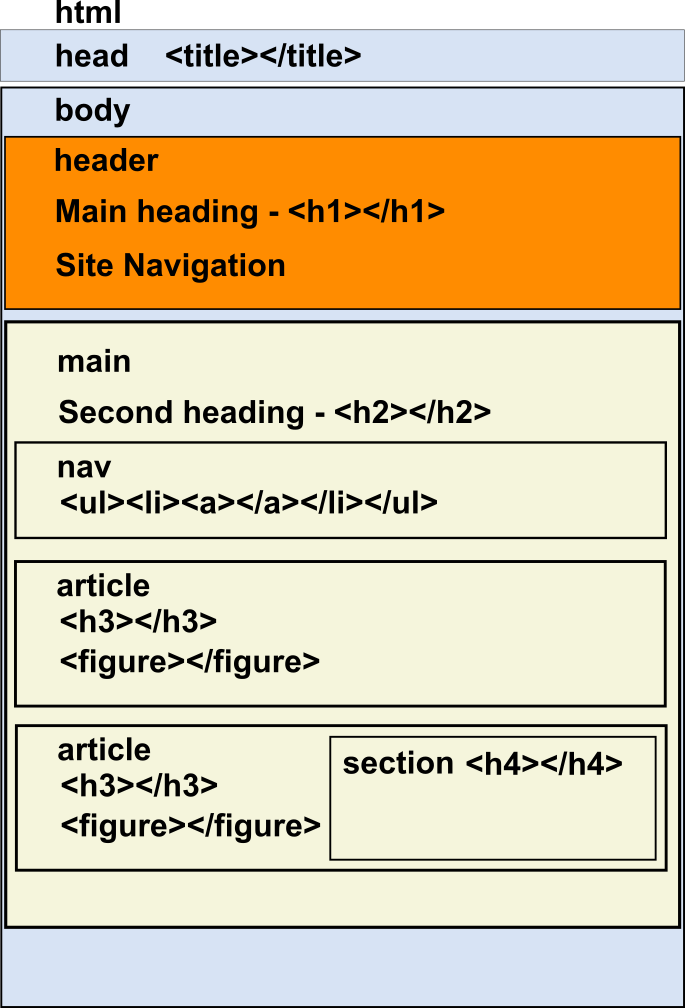
The <section> and the <article> tags are related. We stated that an <article> holds a self contained unit of text and/or other media. If this unit is large it may need to be broken up into sub units in the same way that headings are broken into sub headings. If this is the case then each subunit within an article could go into its own <section>. So just as an <article> block can be repeated within <main>, so a <section> can be repeated within an <article>.
Like the <article> element, each <section> element should have an id with a unique value and a heading. In this case the heading should be of <h4> type[9].
Go to top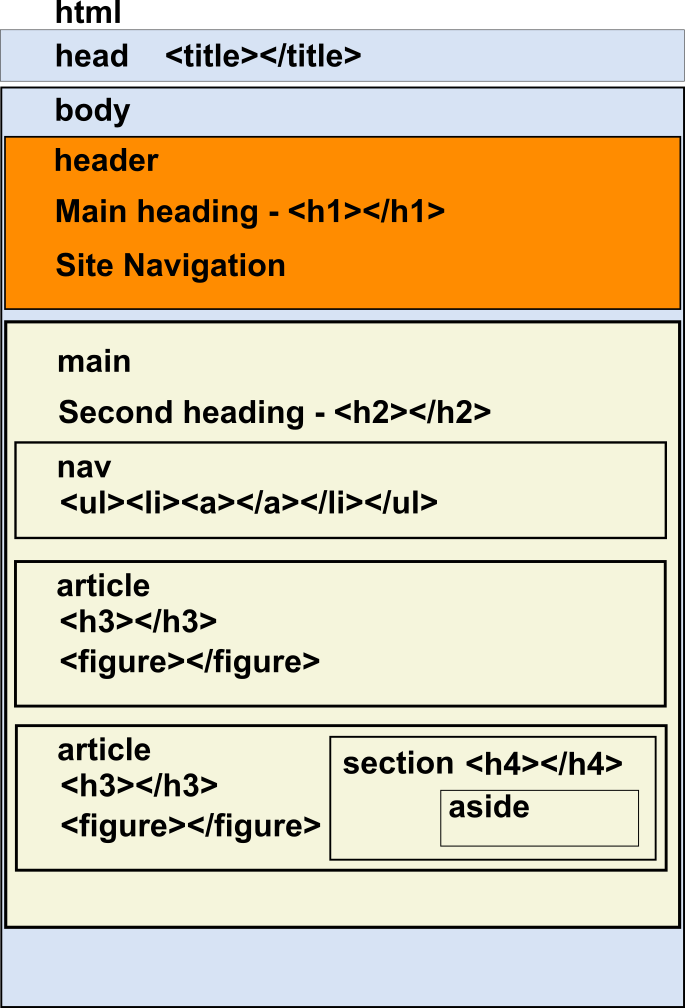
We shall be using this tag only occasionally. It is generally used when we want to supply information that is not directly related to the content of the <article> tag, but either complements it or shows it in a different light
As a general rule the <aside> block can be nested within either the <article> or the <section> tags but it is not meant to be used to contain top level information. It is generally formatted differently to the blocks that contain it[10].
Go to top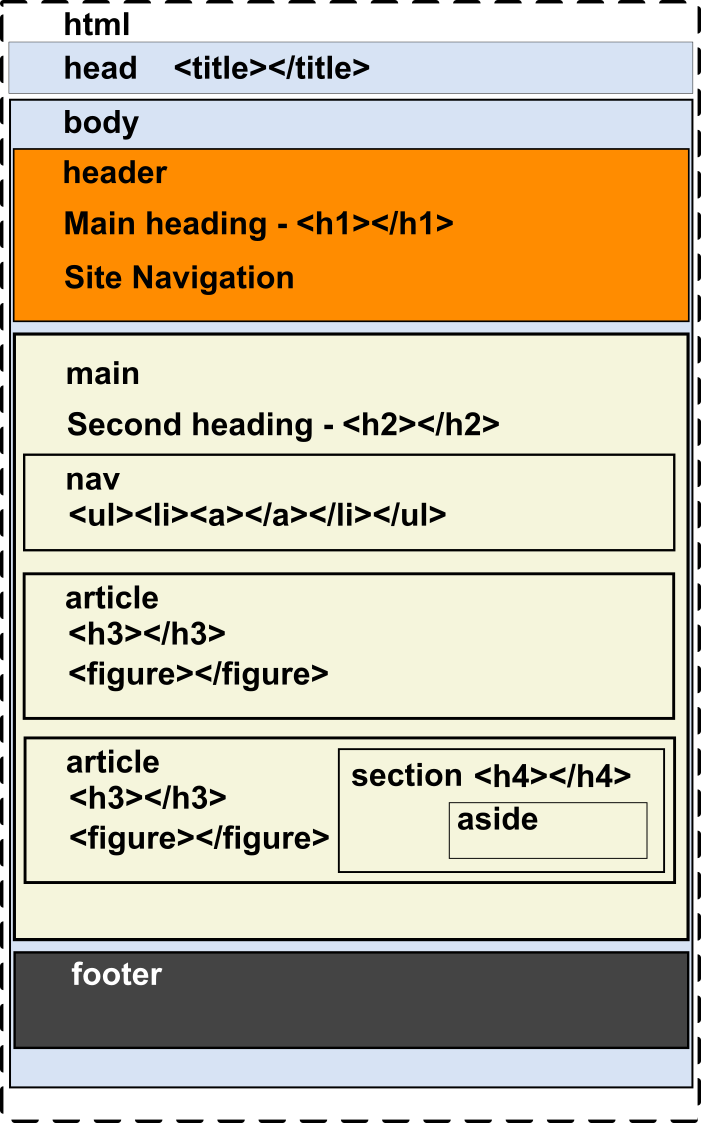
Although you can put anything you like into the footer, including all of the things that are put into <header> or <main>, normally footers are used for company contact details and other ancillary data that does not fit into <header> or <main>[11]. In our case we shall use it to store references to sources from which we got our data, or recommendations on where to find more information.
Go to topAlthough we have not written any HTML code yet we have spent our time on this page discussing the correct way that HTML elements should be marked up. Follow this link for further information on correct markup of an HTML page
We have introduced the lang attribute of the <html> tag which helps screen readers determine the main language of the page.
Go to topThe above diagram illustrates how the part of the web page between the tags <html> and </html> will be structured. It has two child elements: the <head> and the <body> elements.
The <body> block is shown as the container of the elements <header>, <main> and <footer>.
As their names imply they are the three logical structures of any text document, whether paper based or electronic. In school essays they were knows as introduction, main part and conclusion.
They will be performing a similar function in our accessible web page, but being electronic they will have a few extra features added to them.
The layout shown in Fig 8 above will be implemented as a structure for the pages of the website that we plan to build. The layout, however, is not exclusive to that site. It could be used as a template for any other site where one or more of the following is a requirement:
On the next page we shall look at how to implement this design in HTML.
Go to top1. Describe the primary purpose of the <html> tag and the elements it directly contains.
2. Explain how the lang attribute in the <html> tag helps assistive technologies like screen readers.
3. What is the significance of setting the font-size attribute to 100% in an accessible web page?
4. Outline the key components of the <head> tag and their roles in an HTML document.
5. Discuss the recommended structure of the <body> tag and why this structure is beneficial for accessibility.
6. What is the function of the <nav> element in a web page, and where can it typically be located?
7. Explain the purpose of the <main> tag and why it is important to have only one <main> element in an HTML document.
8. How does the <article> tag contribute to structuring web content, and what are its typical use cases?
9. Describe the role of the <aside> tag and provide an example of how it might be used in a web page.
10. Summarize the types of information that are commonly included in the <footer> tag.