The online Cambridge English Dictionary defines the word selection as 'the act of choosing someone or something'. It is an activity that we perform every day, often without even thinking about it. The online Thesaurus, thesaurus.com states that it is synonymous with 'decision', in other words making choices. We humans make choices every day and have been able to get computers to make choices as well.
In programming selection means choosing one option out of two or more options or possibly not choosing any option at all. For our examples here we shall be focusing on the Edisons’ ability to sense its environment regarding distance and ambient light and to make decisions according to the information it receives. We shall also have the robot make decisions based on inputs other than the obstacle detector. Thus as well as learning to program the robot to make decisions we will also be learning how to use its light sensors, line tracker and keypad
Edison has two light sensors in front: one on the left and one on the right. To measure ambient light Edison you can use one of two functions: Ed.ReadLeftLightLevel() or Ed.ReadRightLightLevel(). Either will return a value between 0 and 1023, where 0 is total darkness.
For us humans sensing light level is difficult since our pupils contract in bright light thus allowing less light through, while they expand in low light levels to allow more light through. Types of ambient light we have to cope with include:
A room at night with lights on
A room during the day with no lights and curtains closed
A room during the day with no lights and curtains opened
A room during the day with lights on and curtains opened
In the open air on a cloudy day
In the open air on a sunny day
When programming Edison using it's light sensors, we can set light levels by trial and error until we get values that work for the particular environment we are working in, and those values may not work in an environment with different light levels. You may therefore need to adjust the light levels in the examples below if you want to try them in your own environment, and trial and error is the only way to do it.
Simple Selection: if..else
For our first example we shall get Edison to beep if the light level is below 50. (I got this light level in a bright room by placing Edison at the back of a partially open desk drawer.) The algorithm is below.
In this code sample the if construct spans lines 2 - 4, with the controller at line 2. First we notice that it is somewhat like the if or while constructs we looked at in the previous page. The similarity lines in the fact that the control line ends with a semi colon and that the body, i.e. lines 3 and 4 are indented.
At line 1 a variable named Luminosity is created, then the function Ed.ReadLeftLightLevel() is called to read the ambient light level. The value it calculates is then stored in Luminosity.
At line 2 the value in Luminosity is tested for being less than 50. If this is true, i.e. if for example the value in Luminosity is 20, then the body of the construct, i.e. lines 3 and 4 will run. Line 3 will play a beep and line 4 will cause the program to wait for 2 seconds before finishing.
If the light level read at line 1 was greater then 50, i.e. if for example it was 70, then the test at line 2 would be false since 70 is not less than 50. Since the condition would be false the body of the loop would be skipped. As there is no other code beyond the body of the loop the program would finish without doing anything.
In Listing 1 the robot performed any actions only if the light level was below 50. In listing 2, however, we get the robot to do one action if the light level is less than 50 and a different action of the light level is greater than or equal to 50. In this case the if..else construct spans lines 2 - 5 with the body of the if in line 3 and the body of the else in line 5. If the condition at line 2 is true, i.e. if Luminosity is less than 50 then line 3 is executed and line 5 is skipped. On the other hand if the condition at line 2 is false then the body of the if, i.e. line 3, is skipped and the body of the else, i.e. line 5 is executed.
Again at line 1 the ambient light is measured and the value stored in the variable Luminosity. At line 2 the value is tested for being less than 50. If this is the case line 3 is activated and Edison beeps. The body of the else, i.e. line 5, is skipped and line 6 is executed
If the value of Luminosity is greater than 50 then the condition at line 2 will be false. For this reason the body of the if, i.e. line 3 is skipped and the body of the else, i.e. line 5, is executed. Finally line 6 is executed.
Notice that regardless of the value of Luminosity line 6 is always executed. The reason is that it is not part of the if..else construct. This is indicated by the fact that it is not indented.
So, in general, what have we learnt here? The if..else construct has two components: the if component and the else component. Only one of those components ever gets executed during a single run of the programme, the two of them never get executed together but one of them always does.
This example gives us a complete if..else construct, and for simplicity’s sake we have only one command in both the if and the else components. It does, however, give us a fairly basic light meter that will tell us if it’s dark or bright by either playing a short beep or a longer middle C.
Simple Selection Exercises
Exercise 1: For listing 1 write down the numbers of the lines that would be executed if Luminosity had a value of 30. Again write down the numbers of the lines that would be executed if the value of Luminosity was 200.
Exercise 2: For listing 2 write down the numbers of the lines that would be executed if Luminosity had a value of 20. Again write down the numbers of the lines that would be executed if the value of Luminosity was 90.
Exercise 3: Modify Listing 1 so that if the light level is greater than 30 the robot beeps.
The if..else construct
In Listing 2 the bodies of the if and the else had only one line of code each. In order to avoid giving the impression that each part of the construct can only have one command line, we have extended the example to that shown in Listing 3 below so that both the if and else parts have more activity.
Listing 3: A larger program with an if..else construct
If you compare Listing 2 and Listing 3 you will notice that the first two lines and the last line of both are the same and that the first line in both the if and the else parts are also the same. All we have done is to add more commands to both parts.
If..Else Exercises
Exercise 4: Write down the numbers of the lines that will be executed in Listing 3 if Luminosity has a value of 36. Next write down the numbers of the lines that will be executed of the if the value of Luminosity is 240.
Exercise 5: Modify Listing 3 so that if the value of Luminosity is less than 50 the following actions will take place:
the robot spins 180 degrees to the left
the left and right leds go on
robot moves forward 5cm
robot spins 180 degrees to the left
robot moves forward 5cm
the left and right leds go off
If Luminosity is greater than or equal to 50 then each note from middle C to high C is played. There must be a time-wait of two seconds between each note.
So far in the course we have looked at two types of data entry. In the page on Iteration we looked at reading distance to obstacles using the infra red transmitters on the robot using the function Ed.ReadObstacleDetection() function. So far on this page we learnt to read the intensity of the ambient light using the function Ed.ReadLeftLightLevel(). Here we are looking at a third way of getting input from outside the robot, this time using the keypad.
The Edison robot has a keypad with three buttons on its upper surface, a triangular button, a square button and a round button. Usually the triangular button is used to start a programme within Edison while the square one is used to stop that programme running. The round button is for loading programmes.
Once a programme starts running we need the square button to stop it. However the other two buttons are not doing anything and therefore can be used for user input. For our first example we shall create a programme that plays middle C whenever the triangular button is pressed. The algorithm is shown below.
For the Edison to read data from the keypad it has a memory buffer where an indicator is stored whenever a key of the keypad is pressed. The indicators are as follows:
Ed.KEYPAD_TRIANGLE
Ed.KEYPAD_ROUND
Ed.KEYPAD_NONE
Clearly the first two are the indicators for the triangular and round buttons while the third indicator indicates that no key has been pressed. There is no indicator for the square button because, as we have indicated earlier, it cannot be used for user input.
To run a programme in Edison you press the triangular key, which, as well as starting the programme running, also stores the indicator Ed.KEYPAD_TRIANGLE in the buffer. We need to clear this. This is the reason we have Clear buffer as the first line in Algorithm 2.
Algorithm 2 is implemented in Listing 4. At line 1 we clear the keypad buffer by actually reading its value.
At line 2 we pause the program for 3 seconds to allow the user time to press either the triangle or round key.
Line 3 reads the contents of the keyboard buffer and stores the result in the variable KeyType.
Line 4 tests the value stored in KeyType for being equal to Ed.KEYPAD_TRIANGLE. If it is then then note middle C is played and the programme is halted for two seconds.
If the user happened to have pressed the round key then the value Ed.KEYPAD_ROUND would be stored in the keypad buffer. For this reason at line 4 the test would be false and therefore the program control would jump to line 6 without giving any output.
If we wish to use the round button as well as the triangular button for providing user input then we need to expand Algorithm 2 and Listing 4 to accommodate this button as shown below.
Like their algorithms, Listing 5 is identical to Listing 4 except for the second last two lines. The keyword else is used to provide an alternative choice if the key pressed was not the triangular key. In this case the only other key that could be pressed would be the round key and thus if that key was pressed then it would be caught in the body of the else.
To examine this code we only need to start at line 6 since we have described lines 1 - 5 when discussing Listing 4. Suppose that before line 3 is executed the user presses the round button. In this case the value Ed.KEYPAD_ROUND would be stored in the keypad buffer. When line 3 is executed this is read from the buffer and stored in the variable KeyType. (Remember that the buffer is then cleared by storing the value Ed.KEYPAD_NONE in it.) At line 4 the test for the if condition will be false since the variable KeyType is not equal to Ed.KEYPAD_TRIANGLE. For this reason line 5 would be skipped and control would pass to line 7 where the note high C would be played. As before line 8 would pause the program before finishing.
Keypad Exercises
Exercise 6: Modify Listing 5 as follows: if the triangular button is pressed make it beep, do a turn to the left or right and turn its leds on and off as in lines 3 - 11 of Listing 3. Otherwise, if the round button is pressed make it play the notes from middle to high C, with 2 second time waits between each note. If you need to, look at how Listing 2 was converted to Listing 3.
Exercise 7: Modify Listing 5 again and add a different set of actions inside the bodies of the if and the else. Do not copy exercise 6 but make up your own actions. If you want to experiment insert two different exercises you have done from previous pages or two listings from the same pages.
Note:Copying code containing loops into the bodies if and/or else may be a good way of introducing nested constructs
In the previous page we looked at nested loops, where we had a while loop nested inside a for loop. In the summary of that page we pointed out that a for loop can be nested inside a while loop and that loops of any type can be inserted inside each other to any depth. Here we shall extend the nesting idea further so that we can look at if and if..else constructs being nested inside inside loops.
Burglar Alarm: if construct nested in a while loop
To examine the concept of an if construct nested inside a while loop we shall look at developing a burglar alarm for a desk drawer where we keep valuable objects. If the drawer is closed the light level is low, whereas if the drawer is open the light level goes up. We shall use this fact to design our alarm system: if the light level is above 30, beep the alarm, otherwise do nothing.
Of course for this to work the light level must be tested at regular intervals such as once every two seconds, over a fairly long period of time. To accomplish this the light level testing must be embedded inside a loop that iterates indefinitely. This has to be a while loop. Our burglar alarm therefore will be an if construct nested in a while loop that iterates indefinitely.
But how do we get a loop to iterate indefinitely? In our discussion above we stated that the while loop containing the if construct must iterate indefinitely. Up to now we designed our while loops so that they would end either due to values set within the program itself or else from values read by the sensors. As an example of the former, in Listing 5 of the page Iteration we had two lines of code that looked as follows:
movingDistance = 20
while movingDistance < 90
Later on in the same program, as the final line of the body of the loop, we had the line
movingDistance += 20
At the first run through this piece of code movingDistance would be set to 20 at the first line. At the second line movingDistance was checked for being less than 90 using the comparison operator '<'. Clearly the phrase '20 is less than 90' is true and since the system found a true comparison the body of the loop was activated.
Eventually the final line of the body of the loop would be reached where movingDistance would be increased by 20 thus giving it a value of 40. As with all while loops, control returns from the last line to the line containing the while keyword.
Here again the comparison can be phrased as '40 is less than 90' which is also true thus allowing the body of the loop to be activated.
The will also be true when movingDistance has values of 60 and 80. However on the next iteration of the loop the value of movingDistance will be 100.
This time when controls go back to the while loop the phrase '100 is less than 90' is clearly false. This causes control to pass to the next line after the body of the loop, which causes the loop itself to finish.
What we deduce from this is that a while loop will iterate when it 'sees' a value of 'True' In most cases this value is calculated by making comparisons between two values, one of whom will change during each iteration of the loop. However if we wish to have the loop iterate indefinitely then we could supply it with a comparison that is always true. Examples of this could be:
5 == 5
8 < 10
28 > 20
since items being compared are numeric constants which cannot be changed while the program is running and, therefore will always be true.
The comparisons above always make a while loop run indefinitely since they will always return a value of true. They could certainly be used to make a while loop run indefinitely but there is far more elegant alternative:
while True:
This is how we shall construct our loops that will run indefinitely.
The algorithm for the application that will contain an if construct embedded in a while loop and the corresponding code is shown below.
Listing 6
                                while True:
                                    Luminosity = Ed.ReadLeftLightLevel()
                                    if Luminosity > 30:
                                         Ed.PlayBeep()
                                    Ed.TimeWait(2000, Ed.TIME_MILLISECONDS)
With the concept of the while True: established, we can deduce that lines 2 - 5 of listing 6 will run indefinitely until the user shuts down the program by pressing the square button. Let us therefore look at those four lines.
Line 2 reads the value of the left light sensor and stores the result in the variable Luminosity.
Line 3 checks if Luminosity has a value greater than 30. If it does then line 4 is activated and a beep sounds.
Control now passes to line 5 where the program waits for 2 seconds before going back to line 2 where the light level is read once more.
Now let us look at what happens if the light level is less than 30. If it is the comparison test at line 3 will return a value of false, which means that line 4 will be skipped, line 5 will wait for 2 seconds then goes back to line 2 in order to read the light level again.
Thus when shut up in a dark desk drawer the line execution sequence of the code would be 1235235235235...... i.e. line 4 would never be executed until someone opened the drawer thus making the light level rise above 30.
Nested constructs Exercises
Exercise 8: Modify Algorithm 4 and Listing 6 so that if Luminosity has a value greater than 30, a beep is sounded followed by the two light leds being turned turned on. The program pauses for half a second (500 ms), then there is a second beep, after which the two leds are turned off. There must still be a 2 second pause before the light level is tested again.
Along with torch following, line following is among the favorite application for robots. Line following generally assumes a black line on a white surface. The logic of the line following is very simple: if the robot is on a white surface move forward turning towards the black surface. If the robot is on a black surface move forward turning towards the white surface. The robot thus moves forward by zigzagging across the border between the white and black surfaces.
The robot's line tracking sensor is situated on the bottom of the robot in the centre just behind the small glass dome that acts as its front 'wheel'.In order to check on what colour of surface the robot is on, the sensor shines light on to the surface and measures how much light is reflected back. If a high level is reflected back then it is on a white surface, otherwise it is on a black surface.
Both the algorithm and the code follow each other closely thus we only need to look at the code.
At line 1 the line tracking light is turned on, and then the rest of the program can continue. Since the robot is meant to zigzag along a line indefinitely its main body must be inside a loop that iterates indefinitely, i.e. one that starts with while True:, which is line 2.
Line 3 uses the function Ed.ReadLineState() to test whether the line tracking sensor is on a white surface. We know that it is looking for a white surface since it tests if the value returned by the function is equal to Ed.Line_ON-WHITE. If it is then line 4 is activated, and the robot spins right 12 degrees, thus pointing towards the black surface.
On the other hand, if the test at line 3 is false, i.e. if the sensor is on a black surface then the body of the if is skipped and the body of the else: is activated. Here at line 6 the robot turns 12 degrees left, thus pointing towards the white surface.
Line 7 is not part of the if..else construct, but it is part of the while loop. For this reason it will always be executed after the if..else construct finishes. It simply drives the robot forward by 1cm onto either the black or white surface
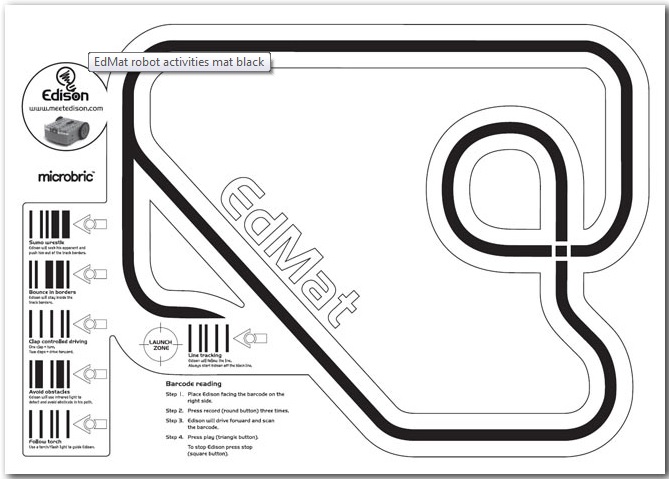
The code above runs fairly slowly since it moves along at 1cm per forward movement. It has been tested out on the official EdMat that can be downloaded from the Edison website. The black lines on this mat are fairly thin and increasing the forward movement to 2cm can cause the robot to move across the line and land on a white surface on the far side of the line and thus move around in crazy circles until it finds some other black surface that it tries to align itself to.
Figure 1: The EdMat is A1 size
In order to give yourself more freedom to experiment with turning angles and forward movement, it is better to create your own testing mat. Any large piece of white cardboard will do. The lines should be drawn using black paint and for good freedom of movement should be about 3cm thick.
A video demonstrating a line tracking program
Line following Exercises
Exercise 9: The Imprisoned Robot Instead of a line that the robot fellows create a space, preferably circular or oval, on a white surface enclosed by a thick black line. The robot is to be placed inside this shape. Programme the robot so that it keeps moving forward as long as it is on a white surface. Once it meets a black surface it moves some centimeters backwards turns at an angle between 45 degrees and 120 degrees and then keeps moving forward until it meets a black surface after which the backwards move and the turn occurs once more.
Think of it as a prisoner randomly exploring the prison walls looking for an opening to escape.
Exercise 10: The agoraphobic robot The code for this is the same as for the imprisoned robot, except this one does not want to escape. It is afraid of being outside! So when it meets a black surface it reverses back at top speed then screams, shudders, flashes its lights etc. Make it as dramatic and hysterical as you like. This is an opportunity to look up the documentation of the robot to find out the best sound and lighting effects that it is capable of
On this page we looked at the concept of Selection, which allows robots and computers in general to make decisions. Of the decision constructs we looked at the simple if construct which allows us to perform an action if a certain comparison is true, but otherwise will do nothing. The other construct we looked at was the if..else construct which performs one or more actions if a condition is true and performs a different set of actions if the same condition is false. A general rule about the if..else construct is that for any run of the construct either the true or the false part are always executed; the true and false parts are never executed together but one of the always is.
With robots, decisions are generally based on data that they receive through their sensors, which is why, apart from obstacle detection, we did not introduce any sensors until now. The sensors we looked at were light sensors, line tracking sensors and the very simple keypad controls. They were good teaching tools for introducing both the if and if..else constructs.
The work requested here will contribute to your grade in AS91883 Create a computer program. As more concepts are studied the work on this assignment will be either extended, or else modified to incorporate facilities provided by the other concepts.
NCEA requirements
A computer program uses:
variables storing at least two types of data (e.g. numeric, text, Boolean)
sequence, selection and iteration control structures
input from a user, sensors or another external source
and one or more of:
data stored in collections (e.g. lists, arrays, dictionaries)
user-defined methods, functions or procedures.
Sequence, variables and loops are used in this assignment, but the main focus is the if and if..else constructs of the Selection concept and data read from light sensors, light tracking sensors and keypad.
Brief
You are required to create a program that will make the robot emulate a vehicle traveling along a road. The road is to be represented by a black line and thus the line tracking algorithm will be used to drive the vehicle forward. The vehicle is continuously looking out for obstacles and if one is detected the vehicle stops until the obstacle is removed, after which it carries on. When the vehicle enters a tunnel it will turn its leds on and turn them off again once it exits the tunnel.
While the vehicle is waiting for the obstacle to be removed it will continuously sound a single beep or a series of beeps very close together every five seconds
To create the tunnel use strong black paper and fold it in an arch over a portion of the black line that represents the tunnel. The tunnel should be about 21cm long.
The following evidence of completion must be supplied:
Algorithms for code. You may supply separate algorithms for each component of your code
Copy of the code
Video of the robot executing the programs
Main components of the code commented as well as an overall comment
Written documentation of how you completed your project
Marking Scheme
Assignment Components
Grade
Robot can follow line accurately
A
Robot stops when obstacle detected
A
Robot does not restart until obstacle removed
A
Lights are on inside tunnel only
A
Video of the running program submitted
A
Some valid comments in the code
A
Basic documentation supplied
A
Robot plays a beep while waiting for removal of obstacle
M
Either the main components or the overall comment are provided
M
Robot plays a series of beeps ever 2 seconds while waiting
E
Both the main components and the overall comment are provided