Learning Outcomes
On completion of this lessson you will be familiar with the most common string processing functions available in the JavaScript language.
Go to topOn completion of this lessson you will be familiar with the most common string processing functions available in the JavaScript language.
Go to topIn most programming languages blocks of text stored in variables are referred to as strings. Similarly the same languages provide a number of functions that allow us to process those same strings. JavaScript itself has 51 such functions, 15 of which are deprecated. Of the remaining 36 we shall be using includes(), startsWith(), padStart(), replaceAll(), slice(), toLowerCase() and trim()
Go to topBelow is our first example of using strings. It processes the strings using the traditional if..else construct. We are using this example as a start off since most programmers are familiar with the concept. We shall follow that with another application that performs the exact same processing but uses a different technique to the if..else construct.
                        <!DOCTYPE html>
                        <html lang="en">
                            <head>
                                <script>
                                    function tryOut(){
                                        const poem ="Shall I compare thee to a summer's day? Thou art more lovely and more temperate";
                                        const searchWord = "compared";
                                        var result='';
                                        if(poem.includes(searchWord))
                                            result="The Poem contains the word " + searchWord;
                                        else
                                            result="The Poem does not contain the word " + searchWord;
                                        alert(result);
                                    }
                                </script>
                            </head>
                            <body>
                                <main >
                                    <button onclick="tryOut()">Click Me</button>
                                </main>
                            </body>
                        </html>
The body of our program spans lines 17 to 21. Inside the main block it has a single button element that calls the function tryOut(). The rest of this application concentrates on this function.
The function tryOut() spans lines 5 to 14. Line 6 declares a String constant named poem. It contains two lines of a Shakespearean sonnet: "Shall I compare thee to a summer's day? Thou art more lovely and more temperate".
We shall be using those two lines for trying out our selection of JavaScript's functions. In this, our first example, we shall test if our string contains the word 'compared'
For this we need to use two more variables. The first variablesearchWord is defined at line 7 and containing the value 'compared' and result is defined at line 8, containing a blank.
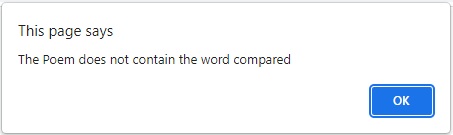
At line 9 we use the includes() function to search for the word 'compared' inside the variable poem. Of course it will not find it and therefore includes() returns a value of false. For this reason line 10 will be ignored and control will pass to line 12. This line concatenates "This Poem does not contain the word " with the value of the variable searchWord and stores the result in result.
Line 13 displays the value of the variable as a dialogue box as shown in Fig 1.
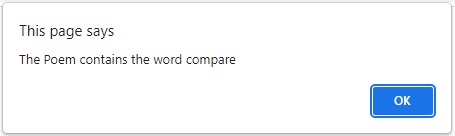
If we changed line 7 to:
const searchWord = "compare";
In this case includes() would return a value of true, which means that line 10 would be executed. Line 13 then would display a message as shown in Fig 2 below.
For our next example we shall use an alternative to the if..else construct that is a little 'cooler' and less pedantic. Better still it results in shorter code.
                        <!DOCTYPE html>
                        <html lang="en">
                            <head>
                                <script>
                                    function tryOut(){
                                        const poem ="Shall I compare thee to a summer's day? Thou art more lovely and more temperate";
                                        const searchWord = "compare";
                                        var result=`The word "${searchWord}" ${poem.includes(searchWord) ? 'is' : 'is not'} in the poem`;
                                        alert(result);
                                    }
                                </script>
                            </head>
                            <body>
                                <main >
                                    <button onclick="tryOut()">Click Me</button>
                                </main>
                            </body>
                        </html>
The HTML code for Listing 2 is identical to that of Listing 1. Of the function tryOut() lines 5 to 7 and line 9 are also identical. The if..else construct has disappeared and is replaced by the somewhat cryptic line 8. This is the only part of the code that we need to explain here.
var result=`The word "${searchWord}" ${poem.includes(searchWord) ? 'is' : 'is not'} in the poem`;
Here we have two instances of a new construct: a dollar sign followed by a pair of curly brackets. The first occurrence is "${searchWord}". Here we have the variable searchWord between the curly brackets. This is the same as saying 'replace this construct with the value of the variable searchWord. Thus our new string would begin as 'The word "compare"'.
The second construct is less straightforward. It is in two parts, the parts separated by the question mark. the first part poem.includes(searchWord) uses the function includes() to search for the word 'compare' in the string poem. Looking at line 6 we know that the word will be found there and thus includes() returns a value of true.
The second half of the construct involves two phrases: 'is' and 'is not'. If the condition in the first part is true then 'is' is selected, otherwise 'is not' is selected. In our case the condition is true and thus the next stage of our string building will result in 'The word "compare" is
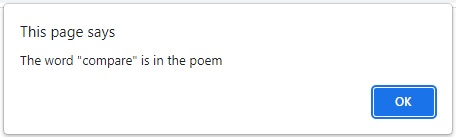
The rest of the string contents is outside of the curly brackets and therefore it will be added on to the end. Thus the value stored in result will be 'The word "compare" is in the poem.
This is shown in Fig 3 below.
Many of the names of our functions are self explanatory. Our current example, startsWith() is no exception. It informs us if a piece of text starts with a particular phrase. It is a true/false type of a function. This means that if it discovers that a piece of text starts with a particular phrase, it returns true, otherwise it returns false.
In the code below we build a web page that allows us to test the function with a variety of examples.
There is a major difference between this example and its two predecessors in Listing 1 and Listing 2. In Listing 1 the main string is hard coded into the program at line 6, while the string we shall be searching for is hard coded at line 7.
The exact same comments apply to Listing 2.
our example in Listing 3 below is more interactive. The user will manually enter both the main string and the data to be searched for into two separate input elements. This will allow the user to try out a number of searches on it using different search strings.
                        <!DOCTYPE html>
                        <html lang="en">
                            <head>
                                <title>Strings</title>
                                <script>
                                    function analyseThis(){
                                        myString = document.getElementById("dataInput").value;
                                        searchString = document.getElementById("SearchWord").value;
                                        outputString = `The text you entered ${myString.startsWith(searchString) ? 'starts with' : 'does not start with'} ${searchString}`;
                                        document.getElementById("display").textContent = outputString;
                                    }
                                </script>
                                <style>
                                    article{
                                        width: 500px;
                                    }
                                    main{
                                        width: 600px;
                                        margin: 0 auto;
                                    }
                                    button{display: block;}
                                </style>
                            </head>
                            <body>
                                <main>
                                    <p><label for="DataInput">Enter data for processing</label>
                                        <input type="text" id="dataInput"></p>
                                    <p><label for="SearchWord">Enter the search word</label>
                                        <input type="text" id="SearchWord"></p>
                                    <button onclick="analyseThis()">Search</button>
                                    <article >
                                        <p id="display"></p>
                                    </article>
                                </main>
                            </body>
                        </html>
Our HTML component for this example is more elaborate than the previous one. The body spans lines 25 to 35. It has two label and input groups, each enclosed within a paragraph. The two groups span lines 26 to 29.
Line 30 has a button with an onclick attribute that calls the function analyseThis()
Finally lines 31 to 33 comprise an article element. This has a paragraph element inside it with an id value of "display". This is where the results of our search is to be displayed.
In other programming lessons we referred to to each program as having three different sections: input, process and output. Here these same sections can be applied to HTML. Lines 26 to 29 would be the input section since they provide facilities for the user to enter raw data for the program to process. Line 30 would be the process since it calls the function analyseThis() to process the raw data entered by the user. Finally lines 31 to 33 comprise the output since they mark up an article element. This is where the output of the processing is displayed.
Now that we have looked at the HTML code we need to examine the JavaScript code and how it interacts with its HTML counterpart.
The function analyseThis() is called from the button element at line 30 and spans lines 6 to 11.
At line 7 the contents of the input element with the id value of 'dataInput' is read. This is stored in the variable myString. The word we want to test for being the start word is read from the input whose id is read from the element 'SearchWord' and stored in the variable searchString
At line 9 the variables myString and searchString are processed to produce anoter string beginning with either 'The text you entered starts with' or 'The text you entered does not start with'. How this works is explained earlier when we were discussing Line 8 of Listing 2.
At line 10 this string is displayed in the paragraph element with an id of 'display.
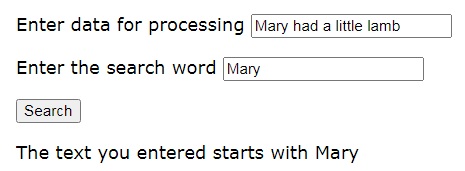
Here is the output when the search word matches the start original text.
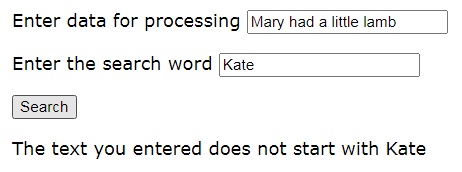
The output when the search word does not match the start of the original text

This demonstrates that the function startsWith() is case sensitive. The word 'mary' does not match with 'Mary' due to the fact that the initial letter of one is 'm' and the other is 'M'.
You can practice the concepts discussed above by entering a piece of text for processing and then a variety of search words to see if they match the beginning of the original text.
Go to topThis function is similar in usage to the find..replace facilities that you find in word processors and text editors. You search the main text for a particular word and if found you replace it with a different word.
The code below in Listing 4 is one step up in complexity from its predecessors. The reason is that the previous examples did not change the main text, only performed a variety of searches on it. Here the processing does change the original text. Also we allow multiple changes to be made to the same text.
                        <!DOCTYPE html>
                        <html lang="en">
                            <head>
                                <title>Strings</title>
                                <script>
                                    function analyseThis(){
                                        myString = document.getElementById("dataInput").value;
                                        originalString = document.getElementById("OriginalWord").value;
                                        replaceString = document.getElementById("ReplaceWord").value;
                                        outputString = myString.replaceAll(originalString, replaceString);
                                        document.getElementById("display").textContent = outputString;
                                        document.getElementById("dataInput").value = outputString;
                                    }
                                </script>
                                <style>
                                    article{
                                        width: 500px;
                                    }
                                    main{
                                        width: 600px;
                                        margin: 0 auto;
                                    }
                                    button{display: block;}
                                </style>
                            </head>
                            <body>
                                <main>
                                    <p><label for="DataInput">Enter the main sentence</label>
                                        <input type="text" id="dataInput"></p>
                                    <p><label for="OriginalWord">Enter the word for replacing</label>
                                        <input type="text" id="OriginalWord"></p>
                                    <p><label for="ReplaceWord">Enter the replacement word</label>
                                        <input type="text" id="ReplaceWord"></p>
                                    <button onclick="analyseThis()">Start</button>
                                    <article >
                                        <p id="display"></p>
                                    </article>
                                </main>
                            </body>
                        </html>
As you can seee from Listing 4 the layout of this example is very similar to its predecessor. Within the HTML code spanning lines 26 to 39 there is only one structural alteration made: there are three input elements there instead of two. This is to cater for the fact that the user must enter the main text, the word to be replaced and the word that it is to be replaced with.
Returning to the code at lines 6 to 13, we see again that it is similar to but more extensive than its counterpart at Listing 3.
The input section consists of lines 7 to 9, where data is read from the three input elements defined at lines 29, 31 and 33.
At line 7 the main text is read from the input element with the id of 'dataInput' and stored in myString. Similarly at lines 8 and 9, data read from the elements with id values of 'OriginalWord' and 'ReplaceWord' are stored in the variables 'originalString' and 'replaceString'.
By now the program has in memory all of the data that it needs to complete its processing. As before the processing section itself consists of only line 10. Here the replaceAll() function is called on myString and the result stored in the variable outputString
Lines 11 and 12 comprise the output section. In line 11 the value of outputString is stored in the paragraph element with the id value of 'display'. At line 12 the same data is stored in the input element with the id of 'dataInput'. This is to allow further replacements to be made on the original text.
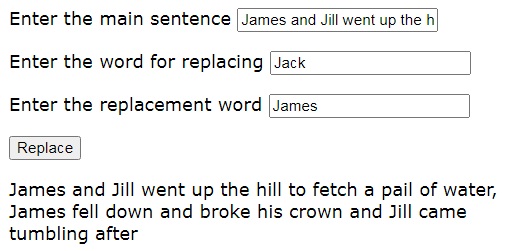
This shows our page after the first replacement has been made. Clearly the original text referred to Jack and Jill and here all occurrences of 'Jack' has been replaced by 'James'.
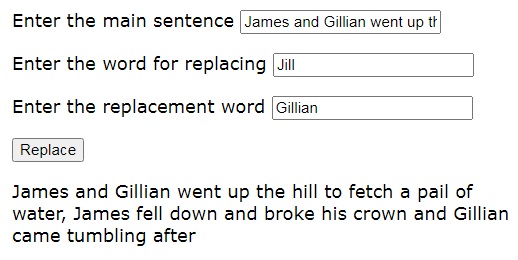
Here we have done our second replacement with 'Gillian' replacing 'James'. Further alterations could be replacing 'hill' with 'mountain', 'meadow' or any other landscape element. Similarly most other words in the sentence can be replaced by other appropriate ones.
Below is a live example for you to practice.
Enter data into the main sentence. Ensure that you have at least one or two words that repeat inside the sentence. Next enter values for words to be replaced and the words that replace them, until you end up with a different sentence.
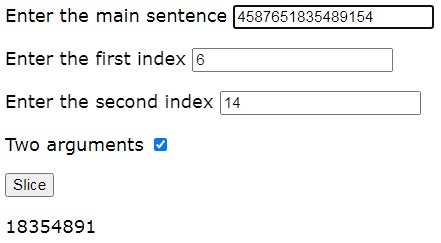
Go to topThis function takes a slice or piece of another string and stores it in a separate variable. It takes either one or two parameters. When taking one parameter it slices from that position to the end of the string.
If the parameter is positive it measures from the left of the string, while a negative parameter measures from the right of the string.
When it takes two parameters it slices from the first parameter position to the second. Either of the parameters can be positive or negative.
                        <!DOCTYPE html>
                        <html lang="en">
                            <head>
                                <title>Strings</title>
                                <script>
                                    function analyseThis(){
                                        myString = document.getElementById("dataInput").value;
                                        beginIndex = document.getElementById("BeginIndex").value;
                                        endIndex = document.getElementById("EndIndex").value;
                                        if(document.getElementById("TwoArgs").checked)
                                            outputString = myString.slice(beginIndex, endIndex);
                                        else
                                            outputString = myString.slice(beginIndex);
                                        document.getElementById("display").textContent = outputString;
                                    }
                                    function toggleSecondArg(){
                                        if(document.getElementById("TwoArgs").checked)
                                            document.getElementById("EndIndex").removeAttribute("disabled");
                                        else
                                            document.getElementById("EndIndex").setAttribute("disabled", "true");
                                    }
                                </script>
                                <style>
                                    article{
                                        width: 500px;
                                    }
                                    main{
                                        width: 600px;
                                        margin: 0 auto;
                                    }
                                    button{display: block;}
                                </style>
                            </head>
                            <body>
                                <main>
                                    <p><label for="DataInput">Enter the main sentence</label>
                                        <input type="text" id="dataInput"></p>
                                    <p><label for="BeginIndex">Enter the first index</label>
                                        <input type="number" id="BeginIndex"></p>
                                    <p><label for="EndIndex">Enter the second index</label>
                                        <input type="number" id="EndIndex"></p>
                                    <p><label for="TwoArgs">Two arguments</label>
                                        <input type="checkbox" id="TwoArgs" onchange="toggleSecondArg()"></p>
                                    <button onclick="analyseThis()">Slice</button>
                                    <article >
                                        <p id="display"></p>
                                    </article>
                                </main>
                            </body>
                        </html>
Our HTML code can as usual be divided into input, process and output sections. The input section consists of four input elements. These are comprised of one text element, two number elements and one checkbox element.
The two number type input elements defined at lines 39 and 41 will hold the left and right positions of the slice.
The process and output sections have not changed.
The reason for the checkbox element is that we need to tell the system that whether you are using one or two parameters and therefore we need the checkbox for toggling between the two.
The JavaScript section spans lines 6 to 21. This time it has two functions: analyseThis() and toggleSecondArg(). The purpose of the latter is to enable or disable the input element whose id is 'EndIndex'. This is to prevent the user from entering data into it when we are using only one argument.
Now let us look at analyseThis().
As with the other examples the contents of the first input element is read into myString at line 7. The two numeric values are read at lines 8 and 9 and their values stored in beginIndex and endIndex
Lines 10 to 13 is an if..else construct.
Line 10 determines whether the checkbox with id 'TwoArgs' is checked. If it is then at line 11 the slice() function of myString is called with two arguemts: where to start slicing and where to end slicing.
Whichever line is executed the slice of text from myString is stored in outputString. At line 14 this is displayed in the paragraph with an id value of 'dsiplay'.
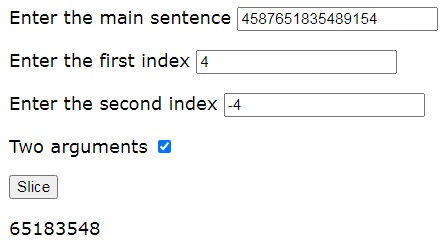
Here we are using two indexes: one positive and the other negative. Both indexes count from zero.
Counting from the left we get the first element of the slice. This gives us the position of the first element of the string to be included in the slice.
The second argument is negative, which means that we count inwards from the left. This gives us the position of the last element to be included in the string.
Here again we have two arguments but both are positive. This means that we start counting from the left for both of them. As before counting starts at zero.
As we know from the previous example the first argument gives us the first element to be included in the slice.
The second argument, however, gives us the position of the first element in the string not to be included in the slice.


Both Fig 11 and Fig 12 follow the same logic as above except that there is only one argument supplied in both cases.
Here is an example for you to practice on.
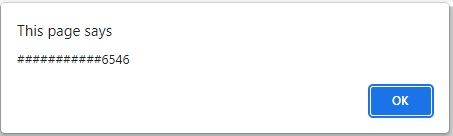
Go to topIf an online purchase is paid by credit card then it is common to get a receipt with a message as follows:
Items paid with card number ************1234
What the system has done here is to strip off the first 12 numbers of the card and replace them with asterisks. The function padStart() allows to do this. The code is shown below.
                        <!DOCTYPE html>
                        <html lang="en">
                            <head>
                                <title>Strings</title>
                                <script>
                                    function analyseThis(){
                                        const cardNumber="217535947486546";
                                        var cardLength = cardNumber.length;
                                        tailend=cardNumber.slice(-4);
                                        alert(tailend.padStart(cardLength,"#"));
                                    }
                                </script>
                            </head>
                            <body onload="analyseThis()"></body>
                        </html>
This is the shortest piece of code we have written so far. It runs automatically because at line 14 above, once the body is loaded the function analyseThis() is called.
At line 7 a string constant cardNumber is initialised with a 16 digit long code number.
Line 8 initialises the integer variable cardLength with the length of the string variable cardNumber.
At line 9 the slice() function is used to slice off the last four digits from cardNumber and store it in the string variable tailend
Finally at line 10 the function padStart() is used to add enough '#' to tailend until it is the length of it is equal the variable cardLength. This padded string is then displayed in a dialogue box by the function alert() as shown below.
To round this off we shall do another example of the padStart() function. Our code is shown below in Listing 7.
                        <!DOCTYPE html>
                        <html lang="en">
                            <head>
                                <title>Strings</title>
                                <script>
                                    function analyseThis(){
                                        const cardNumber="217535947486546";
                                        var cardLength = cardNumber.length;
                                        var sliceSize = Math.round(Math.random()* (cardLength-1))+1;
                                        tailend=cardNumber.slice(sliceSize * -1)
                                        console.log(tailend.padStart(cardLength,"#"));
                                    }
                                    function loopTheLoop(){
                                        for(i = 0; i < 16; i++)
                                            analyseThis();
                                    }
                                </script>
                            </head>
                            <body onload="loopTheLoop()"></body>
                        </html>
The only new piece of code here are lines 9 and 11.
At line 9 we generate random integer numbers in the range 1 to 15 from values returned from Math.random These are stored in the variable sliceSize
At line 10 the value of this variable is used to determine how big a slice we chop off the end of the variable cardNumberThe rest of the processing
At line 11 we use console.log() to show our results instead of the alert() function.
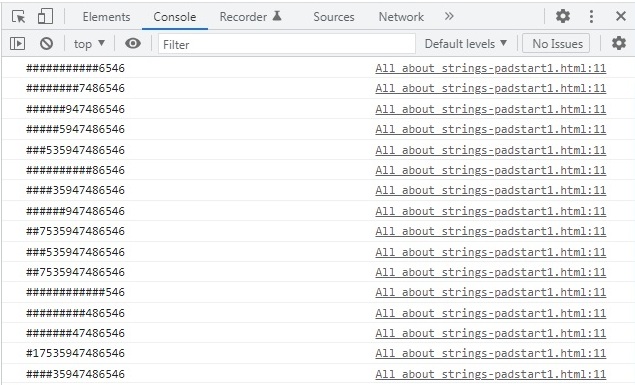
Above we see the 16 outputs to the console from the function analyseThis().
Go to top
                        <!DOCTYPE html>
                        <html lang="en">
                            <head>
                                <title>Strings</title>
                                <script>
                                    function analyseThis(){
                                        const dataString="once UPon A tIME is the STARTLINE OF MANY SILLY STORIES";
                                        var adjustedString = dataString.toLowerCase();
                                        alert(dataString+"\n"+adjustedString);
                                    }
                                </script>
                            </head>
                            <body onload="analyseThis()"></body>
                        </html>
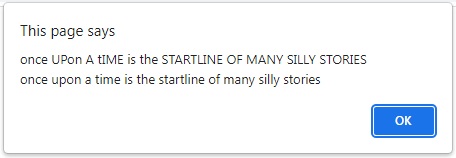
The function toLowerCase(), as its name implies, converts any upper case letters in a string to lower case.
In line 7 of Listing 8 we have a string constant dataString with a line of text that has both upper and lower case letters in it.
In line 8 we use the function toLowerCase() to convert the contents of dataString to lower case. The result is then stored in the variable adjustedString.
Line 9 uses a dialog box to show both the original string and its adjusted version, which are separated by a new line character. This is shown below in Fig 15.
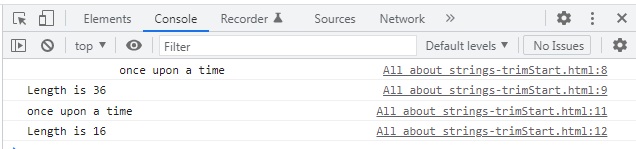
The purpose of the word 'trim' in the name of this function is to remove leading or training spaces from a string variable. It will not remove any spaces between words
                        <!DOCTYPE html>
                        <html lang="en">
                            <head>
                                <title>Strings</title>
                                <script>
                                    function analyseThis(){
                                        var dataString="              once upon a time      ";
                                        console.log(dataString);
                                        console.log("Length is "+ dataString.length);
                                        dataString = dataString.trim();
                                        console.log(dataString);
                                        console.log("Length is "+dataString.length)
                                    }
                                </script>
                            </head>
                            <body onload="analyseThis()"></body>
                        </html>
Again we use console.log() because we have four separate items to print. The code is very simple so we will just rephrase each line as English commands
The result is shown below in Fig 16
The following functions are closely related to the functions that we have studied. Using the links look up their notes on the Mozilla website and then for each mark up a web page with JavaScript content that tests out each of these function. The functions are: endsWith(), padEnd(), replace() toUpperCase(), trimEnd(), and trimStart(). You may use the examples we have looked at above as models and reference.
Go to top