In the world of art and design a pattern is a motif or a symbol that is repeated on a canvas, a piece of textile material or an actual building. Before looking a develping patterns ourselves we shall first look at patterns from two different cultures: Celtic and Maori.
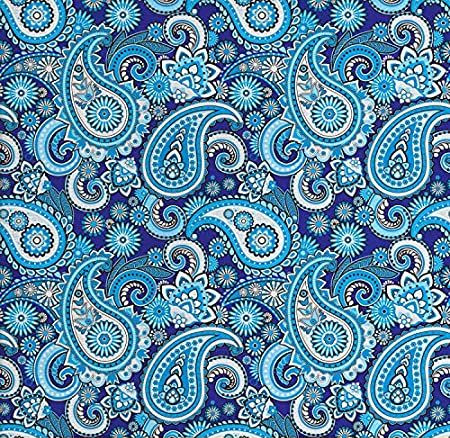
Below we see an extremely complex pattern, which originated in the town of Paisley in Scotland.
Fig 1: A Paisley pattern
This consists of different patterns embedded in other patterns. A deep knowledge of art, textile materials and design would be required to produce patterns of this calibre.
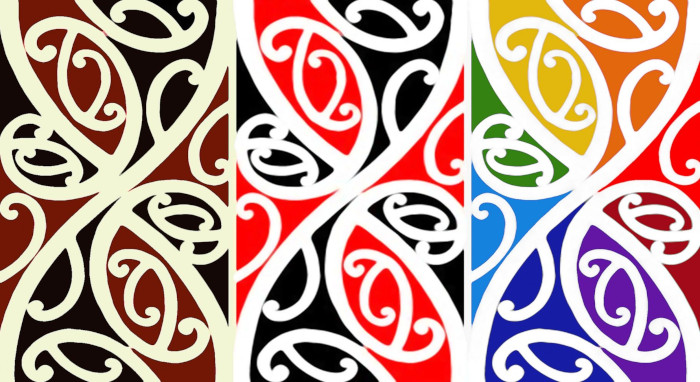
Next we have two modernised version of two ancient Celtic designs.
Fig 2: Two Celtic designs
In those two designs the patterns that make them up are very easy to see. Notice, however, that part of each pattern's design is that fact that it and the next pattern are linked together.
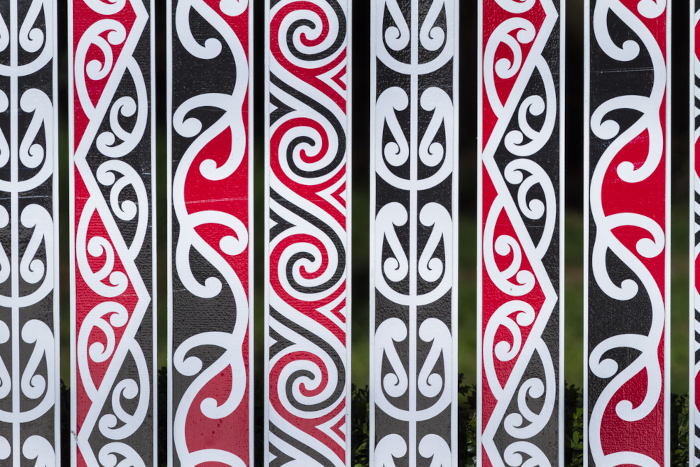
Fig 3: A very modern version of the Maori Kowhaiwhai pattern
Notice that the corners of the rightmost Celtic pattern appear to echo the Maori Kowhaiwhai pattern.
Fig 4: A more traditional version of the same pattern
Unlike the Paisley design above, it is very easy to see the repeated pattern in Celtic and Maori designs. Although we cannot expect in these lessons to produce anything that approaches the magnificance of those patterns, we can still keep them in mind as our ultimate goal.
Instead of the kowhaiwhai and its variants in Fig 3 and Fig 4 we shall use a simple and easy to draw circle. WE can then use that circle to fill other areas.
The defs block in Listing 1 spans lines 2 - 6. The block contains only one component, the pattern. This spans lines 2 - 5. As it is the first time we shall describe each component in detail.
The first attribute of the pattern is the id. Each component of the defs must has a uniqie id so that they can be distinguished from each other.
The width and height work here in the same way as they did elsewhere and so there is not need to elaborate on them.
The attribute patternUnits is an important but also complex and working with it requries a deeper knowledge of SVG than we have achieved so far. For this reason we shall we shall continue using the value "userSpaceOnUse" until we are in a position to compare it with its alternative.
Now going back to our code, the body of the pattern is at line 4. Here we create a circle with a centre at (50,50 and a radius of 50. This means that the circle fits into a square whose coordinates are (0,0), (0,100), (100,100)and (100,0)
Since, at line 3, the space for the pattern has been declared as a 100 X 100 square, our circle will fit perfectly into it.
The pattern element closes at line 5 and the defs element closes at line 6. What's left is a rectangle that we are going to sytle with our pattern.
In line 7 we specify a rectangle that is to be 400 units wide and 400 units high. Since the pattern objec we created above is 100 units wide and hundred units high, 16 pattern units will fit into our rectangle. This is shown below.
Patterns elements are meant to repeat themselves over a surface in order to give character to that surface. The units are not meant to be noticeable as individuals, but contribute to the appearance of the surfact itself.
For the reasons stated above the pattern elements in Fig 5 are quite large and call attention to themselves individually. Another version is provided below in Listing 2 that produce smaller pattern elements.
The SVG element and the viewBox are still 400 X 400, but the pattern element at line 3 is only 50 X 50. Equally the circle element at line 4 is centered at (25,25) with a radius of 25. Thus it will fit into a square with coordinates of (0,0), (0,50), (50,50)and (50,0), which means that there will be 16 X 16 pattern units in our square.
Up to now we only have used flat colours, or more recently patterns, to fill the interior if our shapes. In this example we shall demonstrate how to fill the stroke of a shape.
The plan for this is to first create a pattern for the filling our shapes. Next we create a circle that we shall fill using the pattern. Finally we creat an ellipse with a stroke-width of 80 and no fill. Instead we use our pattern to colour the stroke.
From line 1 we notice that we are using an 800 X 400 frame for this example. Also the pattern we are using is exactly the same as in the previous example. Therefore there is no need to explain it. We are therefore beginning at line 7
Here we are creating a rectangle starting at (0,0) and having the same dimensions as the viewBox. The rectangle will be filled with yellow. It is to form the background to the shapes we are to create next.
At line 8 we create a circle with a centre at (400, 200). Since these values are a half of the width and height respectively, the circle will be centered on the centre of the SVG page. It is filled in the normal way with the pattern created in lines 3 - 5.
Finally we create our ellipse at line 9. Like the circle, it is centered at (400,200), i.e. at the centre point of the SVG page. The horizontal radius is 300 and the vertical radius is 200. This means that it is longer than it is high. At 80, the stroke is very wide. This is in order that it will accommodate the pattern. Finally the pattern is added in the exact same way as we added colour in previous examples.
Up to mow our patterns were all identical; they contained a single blue circle. We shall now look at a more complex pattern. It will consist of two rows of two circles, with each diagonal pair of circles having the same colour and the other pair having a different colour. This is demonstrated below in Fig 8.
Line 1 the SVG element is specified as 400 X 400 with the viewBox having the same dimensions.
Our pattern here starts at line 3. Here it is given an id of "red-blue-circles" and a width and a height of 100. Therefore 16 of this pattern should fit into the viewBox.
Lines 4-7 specify the structure. Notice that the coordinates of the circles in Fig 8 corrrespond to the cx and cy values in lines 4 - 7. This is how the four circles are positioned in the pattern.
At line 10 a 100 X 100 polygon is filled using this pattern. The result is shown in Fig 9 below.
We are not introducing anything new here. We are simply designing a pattern just like the patterns we hav worked with until now. What is different here is the complexity of the pattern itself. It is shown here in Fig 10.
Fig 10
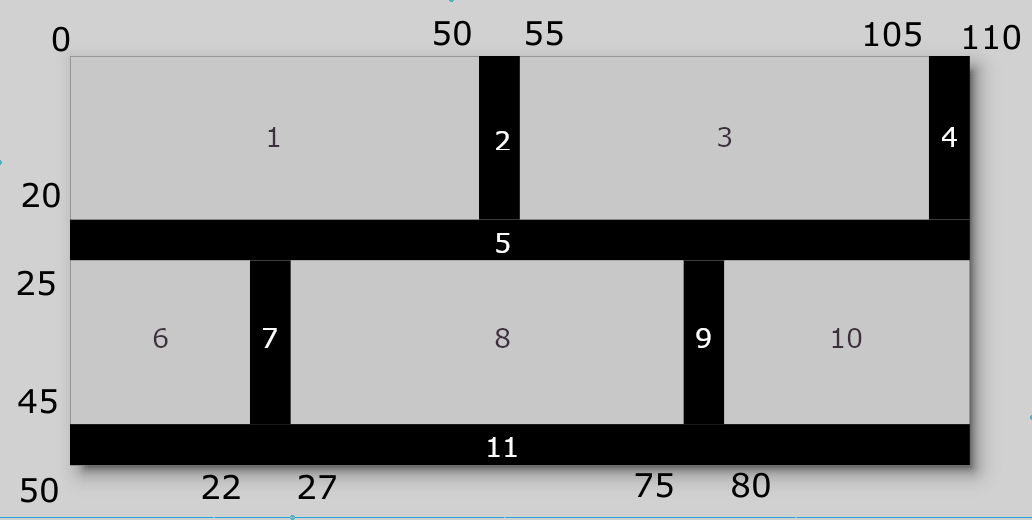
It is a plan for developing a pattern that would depect a red-brick wall. In order to more easily comprehend the code in Listing 5 we shall analyse the structures within this plan.
Firstly the light coloured rectangles represent the actual bricks while the thin black rectangles between them represent the mortar between the bricks.
To code a rectangle in SVG we provide it with the coordinates of the top left corner, the width and the height. (The top left corner is referred to in the table below as the origin.) Thus the top left rectangle in Fig 10 has an origin of (0,0), a width of 50 and a height of 20.
These values, along with the same values for all the other ten rectangles are recorded in the table below.
rect #
origin
width
height
rect 1
(0,0)
50
20
rect 2
(50,0)
5
20
rect 3
(55,0)
50
20
rect 4
(105,0)
5
20
rect 5
(0,20)
110
5
rect 6
(0,25)
22
20
rect 7
(22,25)
5
20
rect 8
(27,25)
48
20
rect 9
(75,25)
5
20
rect 10
(80,25)
30
20
rect 11
(0,45)
110
5
If you compare the data recorded in the table above with the values for x, y, width and height in lines 4 - 14 of Listing 5, you will notice that the values in both correspond with each other.
Explain what a pattern is in art and design. Give three examples of how patterns are used in different cultures.
Describe the purpose of the <defs> block and the <pattern> element in SVG. What are the key attributes of the <pattern> element?
How can you create a simple pattern with a single circle in SVG? Explain the code and attributes involved.
How can you adjust the size and spacing of pattern elements in SVG? Refer to specific examples from the text.
Explain how to apply a pattern to the stroke of a shape in SVG. Provide an example.
Describe how to create a more complex pattern with multiple shapes and colors in SVG. Use the example of the red and blue circles pattern from the text.
Analyze the "Red Brick Wall" example. How is the pattern constructed? What are the key elements and attributes used?
How can you create a pattern that resembles a brick wall in SVG? Explain the steps involved and the code required.
What is the purpose of the viewBox attribute in SVG? How does it relate to patterns?
How can you use patterns to create visually interesting and complex designs in SVG? Discuss different approaches and techniques.