Before starting these lessons you should be familiar with the main constructs of Python. These include:
variables and constants
decision making
loops - including nested loops
lists
functions
You will not be learning any new features of Python itself; you will instead be using a library named pygame which contains functions that we can use to create our games.
Manipulating those functions, however, will give us a chance to use the Python constructs we already know in new and different ways.
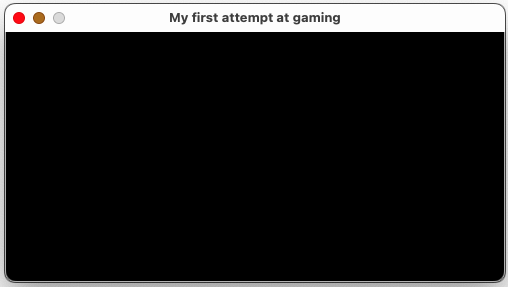
Games are played on windows that are placed on a computer screen. Therefore to begin crating a game we must first create a window on which that game will be played. An example of window creation is shown below in Listing 1
Whatever the complexity of a game, setting up a window for it will nearly always resemble Listing 1. For this reason we shall discuss each line in turn.
Listing 1
import pygamepygame.init()WIN_WIDTH=500WIN_HEIGHT=250gameWindow=pygame.display.set_mode((WIN_WIDTH, WIN_HEIGHT))pygame.display.set_caption("My first attempt at gaming")
At line 1 we import the library pygame. This library will contain all of the functionality required for coding our games, Line 2 initialises pygame or, in other words, it makes its functionality available to our program.
The purpose of this short piece of code is to create a window inside of which we can organise our games. All we want at the moment is to create the actual window and give it a caption. Before creating it, however, we must decide on that window's dimensions, i.e. its width and height.
Lines 3 and 4 create two constants WIN_WIDTH and WIN_HEIGHT which are assigned the values 500 and 250 respectively. These values will determine the width and height of the window.
Line 5 creates our game window. It requires a fairly detailed explanation. The words pygame.display refers to the window that we shall use for our games. It uses the set_mode() function to initialise that window for us by specifying that window's width and height.
Finally line 6 uses the set_caption function to give a heading or caption to the window.
The result is shown in Fig 1 below.
Fig 1: the newly created window
It is not very impressive and can't do anything, so we shall move to the next part to spruce it up a bit.
In this section we shall do what we promised earlier, i.e. sprucing up our game window. There are new concepts introduced here as well as concepts we met earlier but did not go into any detail about.
Below we shall be looking at the use of constants.
Constants are similar to variables but their very names should tell us the difference between them:
once we give a constant a value, we don't change that value anywhere else within the program.
after we initialise a variable, we can change it's value as often as required - programming would be much more difficult if we could not do that.
The language python does not support constants and thus a convention has sprung up. Names in upper case are regarded as constants and programmers don't change their names, althoug they can actually do so.
We have already met and discussed lines 1 and 2 and thus we shall skip to line 4 for for looking at the rest of the code.
Our list of constants stretch from line 4 to line 13. We have encountered lines 4 and 5 in Listing 1 above but here they have different values, simply because we want a larger window. Using the values of the two constants as they are we shall be able to access the top-right, bottom-left and bottom right corners of the window. By dividing them by 2 we shall be able to access the centre of each line as well as the center of the image itself.
Our other constants are BLACK, WHITE, RED, GREEN, BLUE, YELLOW, MAGENTA and CYAN. These are given values as tuples indicating the RGB values of the different colours.
Clearly we are not changing the values of these constants. Changing the value of the constant BLACK would result in the resulting colour being no longer black.
It is much easier to remember the name of a colour than it's RGB value, thus making these constants useful for avoiding wrong values being used.
With our constants set up we shall now look at creating a window and drawing some shapes on it.
Lines 15 and 16 are almost identical to lines 5 and 6 in Listing 1 and thus there is no need to discuss them.
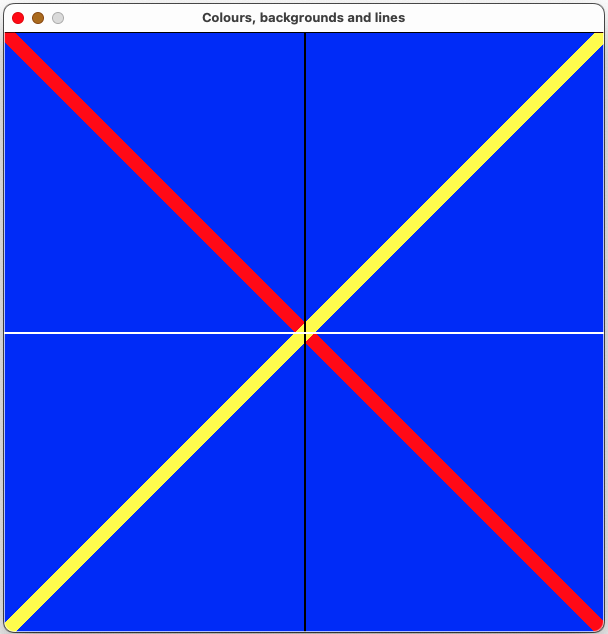
Line 17 fills the window background with blue.
Lines 18 - 21 draw lines on the screen using the pygame.draw.line() function.
We hav reproduced line 18 below. pygame.draw.line(gameWindow, RED,(0,0), (WIN_WIDTH, WIN_HEIGHT), 20) Now we look at the arguments passed to the line() function.
The first argument, gameWindow refers to the screen or window on which the line will be drawn.
The second argument RED specifies the colour of the line.
The third argument (0, 0) is a tuple that specifies the x and y coordinates of the start of the line. The values mean that the line will start at the top left corner of the window.
The fourth argument (WIN_WIDTH, WIN_HEIGHT) specifies the second point of the line. Since WIN_WIDTH and WIN_HEIGHT have both been set to 600 at lines 4 and 5 above, it means that the line will end at the bottom right of the window.
The final argument 20 specifies the thickness of the line: 20 pixels in this case.
Line 19 is reproduced below. pygame.draw.line(gameWindow, YELLOW,(WIN_WIDTH,0), (0, WIN_HEIGHT), 20)
Because WIN_WIDTH is set to 600 a yellow line will start at the top right hand corner of the window. Also because WIN_HEIGHT is also 600 the line will finish at the bottom left of the window.
Line 20 draws lines in exactly the same way as lines 17 and 18. However, it uses slightly different way of calculating the the coordinates of the endpoints, and for this reason we need to discuss this aspect of it.
The coordinates of the first point of the line is shown as (WIN_WIDTH//2,0). Firstly what is the double backslash about? A single backslash signifies division. Thus 8 / 2 gives a value of 4 while 9 / 2 gives a value of 4.5. As we are dealing with positioning points on a grid we can only use integers. Consequently when we want divisions that produce only integer results we use the double backslash, i.e. //. Using this operator we get the following results: 8 // 2 = 4 9 // 2 = 4 10 // 2 = 5
Allowing that both WIN_WIDTH and WIN_HEIGHT have a value of 600 the coordinates of the line are (300, 0) and (300, 600). Similarly the coordinates of the line drawn at line 21 are (0, 300) and (600, 300)
At line 22 the method flip() updates the screen display.
If you run your program using the code in Listing 2-1 and Listing 2-2 alone then you might get a flicker on the screen as the window you so carefully coded was put on the screen and then disappeared, otherwise your window might stay on the screen until you decide to shut it down. Which of the two happens depends on your operating system.
In order to ensure that your window stays on the screen, regardelss of your operating system, you must add the extra piece of code in listing 2-3 to your program.
The code in Listing 2-3 consists of a while loop. The loop, however, is used in a slightly different way to what you may be used to. For this reason we shall go through it in detail.
As the word event occurs twice in the code, we need to explain what it means in the current context. The Cambridge Dictionary defines the word 'event' as anything that happens, especially something important or unusual: This year's Olympic Games will be the biggest ever sporting event. Concentrating on a computer, there are a number of events that also can occur. These include:
pressing any key on the keyboard
moving the mouse pointer over an object
clicking on an object on the screen
Those events can be handled by pygame. The programmer can use each of the same events to cause a function to run. This is how interactive games are created.
Listing 2-3
active = Truewhile active: for event in pygame.event.get(): if event.type == pygame.QUIT: active = Falsepygame.quit()
At line 24 a Boolean variable active is created and set to a value of True. At line 25 a while loop is created. The loop will iterate while the variable active has a value of True.
Lines 26 - 28 form the body of a for loop. The loop iterates through each of the events recognised by pygame. At each iteration of the loop the type of each event is tested for being the QUIT event. If it is then line 28 will set the value of the Boolean variable active to False. If this occurs then the loop will terminate and control passes to line 29 where the function quit() is called to exit the game.
Fig 2: this shows the output of the above programGo to top
In this section we shall look at drawing shapes such as rectangles and circles. The dimensions of those shapes will be proportional to the dimensions of the containing window. By using proportions we shall be able to draw windows of any shape or size - within reason of course - and the shapes inside them will alter their proportions accordingly.
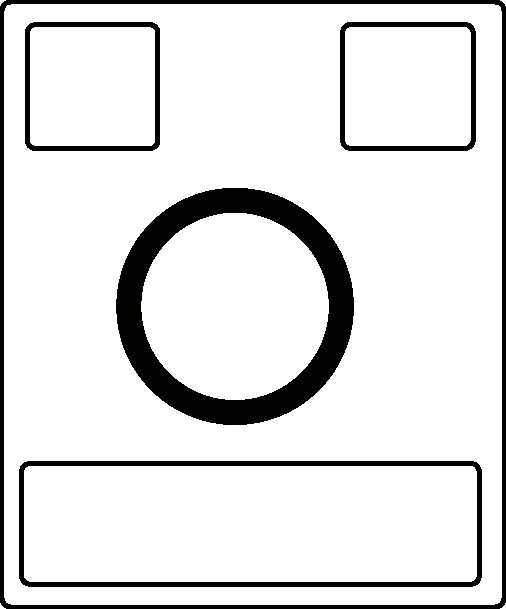
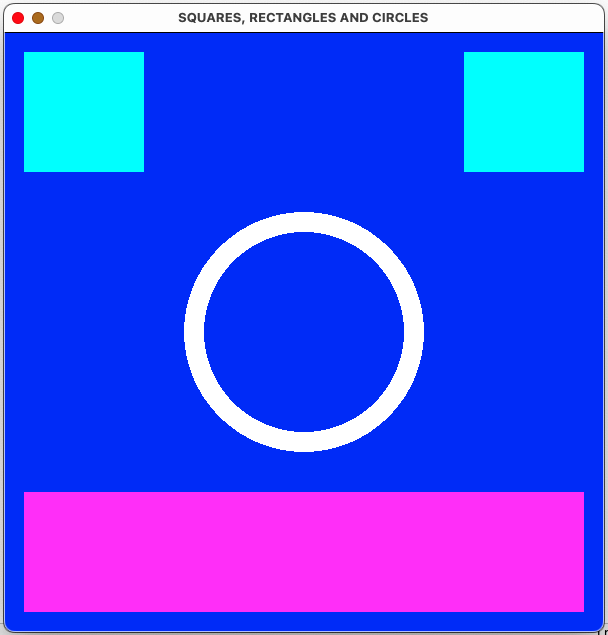
Fig 1: a rough sketch of the shapes we are about to draw
Fig 1 above shows a rough plan of our window. At the top are two rectangles. The width and heights of the rectangles will be proportional to the width and height of the containing window. The centre of the circle will be where the diagonals of the window cross and its radius will be proportional to the shortest side of the window.
The rectangle at the bottom will be will be centered horizontally with a margin of 20 pixels and will be 20 pixels above the bottom of the window.
Now let us look at the code for producing the above design.
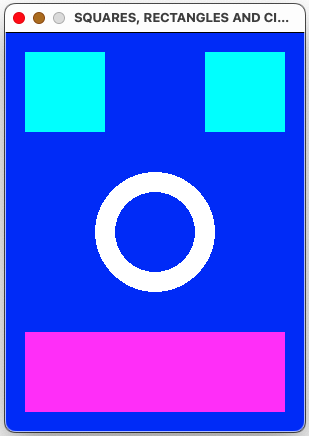
Above our code draws three rectangles and one circle. For drawing a rectangle we use the pygame.draw.rect() function. The first aregument we pass to it is a pointer to the window on which the rectangle will be drawn - gameWindow in this case. Following this we pass the RGB code for the colour that is to fill the rectangle - CYAN in this rectangle. Finally we pass it the position and dimensions of the rectangle using the pygame.Rect() function. This function is passed four parameters: the x and y positions of the top left corner of the rectangle and the width and height of the same rectangle.
Below is a copy of line 18. We shall try to map what we have stated above onto this line.
The first two values passed to the pygame.draw.rect() function are gameWindow and CYAN, i.e. the window where the drawing is to occur and the background colour of that window.
The third value passed is the pygame.Rect() function. This has four arguments of its own: the x coordinate and y coordinate of the top left corner of the rectangle and the width and height of the rectangle itself. The actual coordinates of the top left corner are 20 pixels from the left and 20 pixels from the top. The width of the rectangle is one fifth of WIN_WIDTH which is 300/5 giving 60. Similarly the height of the rectangle is one fifth of WIN_HEIGHT which is 400/5, giving 80.
The dimensions of the second rectangle are the same as the first one, but calculating its x coordinate is different. We want a space of 20 pixels between the the left margin and the rectangle. For this reason the y coordinate must be the width of the window less 20, less 60
Other than the fact that this rectangle is much larger than its two predecessors, there are no new concepts introduced here. For this reason we shall look at how to draw a circle.
Like the rectangles, the first two arguments passed to the function draw.circle() are a pointer to the window object and the colour of the circumference. gameWindow in this case. This is followed by a tuple containing the values of the x and y coordinates of the centre. This is followed by the value for the radius of the circle and the thickness of the circumference.
pygame.display.flip()
The shapes we drew above will have no effect on the display unless we use the flip() function, which updates the display for us.
Listing 3-3
active = Truewhile active: for event in pygame.event.get(): if event.type == pygame.QUIT: active = Falsepygame.quit()
The code in the body of the while loop that keeps the window active has not changed since the previous example and thus there is no need to discuss it.
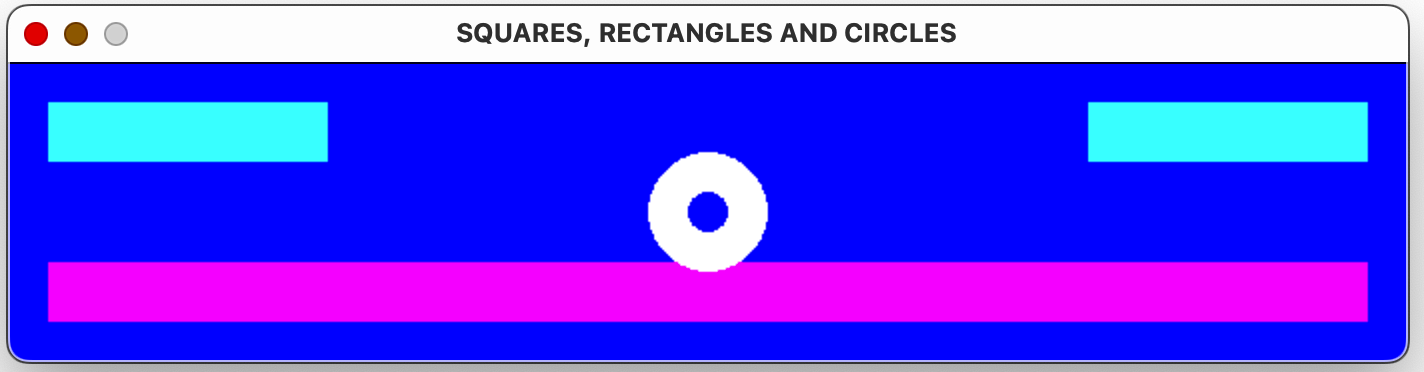
Fig 4: this shows the result of running the code described aboveFig 5: this shows the result of running the code described above except that the values of WIN_WIDTH and WIN_HEIGHT have both been changed to 500.Fig 6: this shows the output when the values of WIN_WIDTH and WIN_HEIGHT are 700 and 150 pixelsGo to top
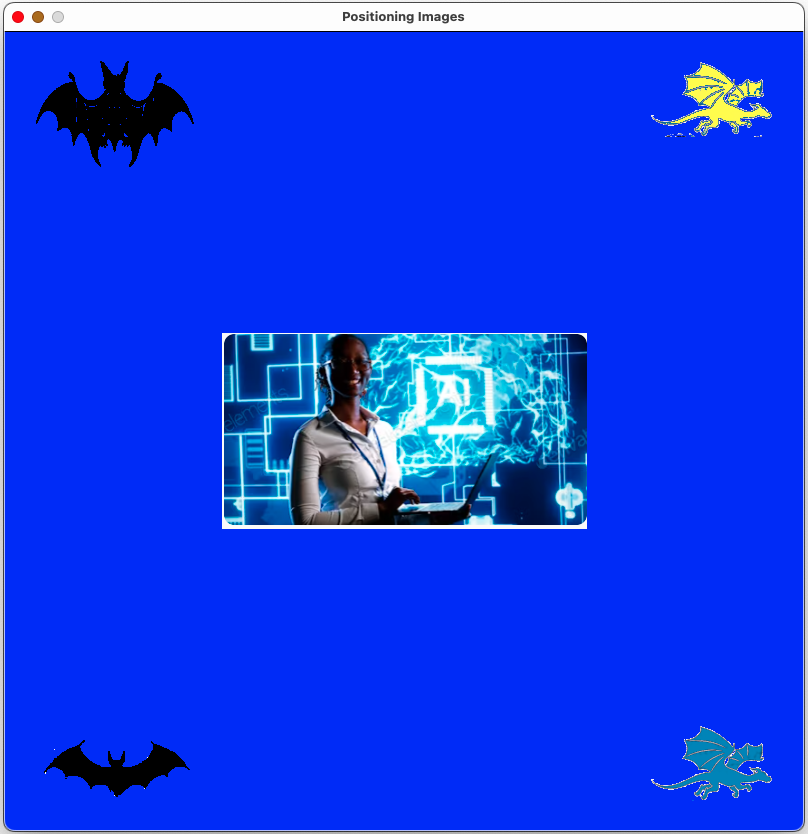
Here we shall be adding existing images to our screen instead of drawing shapes. To prepare for this you need five images, either .png or .jpg type. Also they should be relatively small with 200 pixels as a maximum dimension. For the sake of convenience the images should be in the same folder Python files.
Again our code opens with the usual setup procedures that should be familiar to you by now and so we shall proceed to the code for importing and positioning the images.
Here we shall look at how to import images onto the screen.
At line 14 the image "Bat1.png" is loaded into gameWindow using the function image.load(). A pointer to the file is stored in firstBat.
When we manipulate the image we don't directly manipulate the image itself. Every image has a rectangle associated with it. It is to this rectangle that we usually refer. At line 15 we get a pointer to the image using the get_rect() function. A pointer to this rectangle is stored in firstBatRect. We shall be using this pointer in the next line.
At line 16 we assign the tuple (20, 20) to the topleft property of firstBatRect. This means that the rectangle and its image will be positioned 20 pixels from the left and 20 pixels from the top of the window.
The other four images are positioned in the same way.
Listing 4-3
active = Truewhile active: for event in pygame.event.get(): if event.type == pygame.QUIT: active = False gameWindow.blit(firstBat, firstBatRect) gameWindow.blit(secondBat, secondBatRect) gameWindow.blit(blueDragon, blueDragonRect) gameWindow.blit(yellowDragon, yellowDragonRect) gameWindow.blit(blueScreen, blueScreenRect) pygame.display.update()pygame.quit()
Text is usually and important part of a game. It may be used to give prompt to a user, to inform them how many points they and their oponents have and how many lives they have left.
A game window is not somewhere to place to place a large amount of text. For that we use software such as word processors or PDF files. In a game window we generally use very short phrases and thus we shall add those phrases to our window in almost the same way we have added images above.
Again, similar to the images, for each font we are to use we have to download a file that specifies the layout of that font. You can . Further on you will see that we work with them almost the same way we worked with images earlier. You can download a number of free fonts from the Font Family website
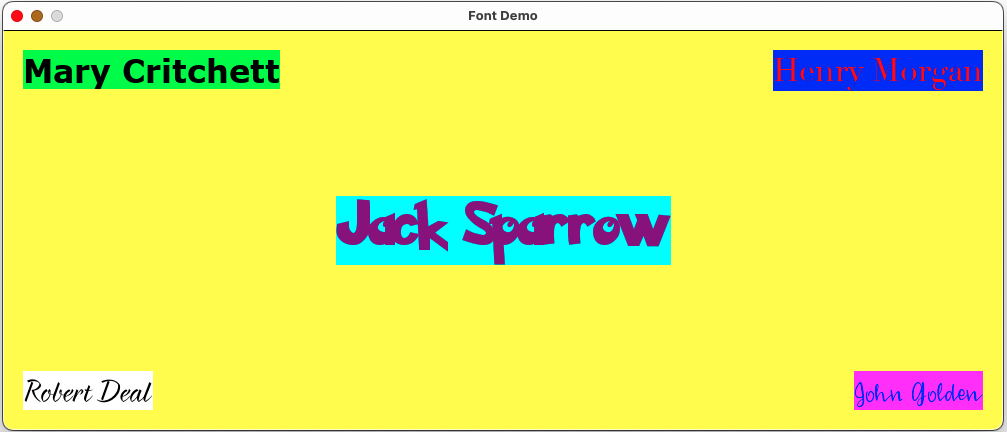
Listing 5-2 above acts as a series of stylesheets for how we are to display our text items. Line 19 specifies our first font. It is to be in the style Verdana. The file "Verdana.ttf" contains the information for how to render the font and the size of the font will be 32. The same applies to the other four fonts we are using.
Above we create five blocks of text, assign a rectangle to each block and finally specify the position that each block is to have on the screen.
At line 25 we apply the style fontVerdana to the text "Mary Critchett". This means that its font will be Verdana and its size will be 32 points. The argument True means that anti-aliasing will be applied to it. The font colour will be black and the background colour will be green.
At line 26 we create a rectangle for the text block using the get_rect() function. This is stored in firstDemo_rect
At line 27 we specify that the coordinates of the top left corner of the rectangle will be (20, 20). This means that it will be 20 pixels to the right of the left margin and 20 pixels down from the top margin.
The other four text blocks are processed in exactly the same manner.
Listing 5-4
running = Truewhile True: for event in pygame.event.get(): if event.type == pygame.QUIT: running= False display_surface.fill(YELLOW) display_surface.blit(firstDemo_text, firstDemo_rect) display_surface.blit(secondDemo_text, secondDemo_rect) display_surface.blit(thirdDemo_text, thirdDemo_rect) display_surface.blit(fourthDemo_text, fourthDemo_rect) display_surface.blit(fifthDemo_text, fifthDemo_rect) pygame.display.update()pygame.quit()
Nothing new is introduced here apart from the fact that we are blitting five elements instead of the usual one or two that we have been blitting up until now.
Below is the output of the program.
Fig 6: The five text blocks displayed according to the positioning instruction in Listing 5-3.Go to top
Now, being able to position images the screen, we now turn to looking at how to move those images around. There are two ways of doing this: using the keyboard keys and using the mouse. We shall begin with the keyboard.
Every key on your keyboard is available for controlling movements on the screen but in our case here we shall use the four arrow keys UP, DOWN, LEFT and RIGHT. The codes for those are: K_UP, K_DOWN, K_LEFT and K_RIGHT.
Other keys commonly used for moving an object on the screen are a, b, c and d, and the codes for those are K_a, K_b, K_c and K_d. If you need to check the code for other keys the the Geeks for Geeks site has a full list of keyboard keys and their corresponding codes.
All of the above code should be familiar to you apart from line 6, and therefore we shall only discuss that line.
For moving the object in this exercise we shall be using only the arrow keys. As an example, for moving the object to the right we shall press down the → key. Next we must determine how far to the right the object will move. We do this by assigning the constant KEY_STEPS a value of 20. Later in the code we shall be using this constant to inform the system that when the right key is pressed the object shall move 20 pixels to the right.
Listing 5-2
game_area = pygame.display.set_mode((WIN_WIDTH, WIN_HEIGHT))pygame.display.set_caption("Moving with the keyboard")dragon_image = pygame.image.load("BlueDragon.png")dragon_rect = dragon_image.get_rect()dragon_rect.centerx = WIN_WIDTH//2dragon_rect.bottom = WIN_HEIGHT
Apart from line 14, the rest of the code in Listing 5-2 should be familiar to you. For this reason we shall look only at the code of line 14.
We wish to place the image horizontally in such a way that its centre will be at the centre of the window. The rectangle has a property of centrex which corresponds to the point where the diagonals of the rectangle meet. By assigning a value of half the width of the window to centrex the object will be centered horizontally on the window.
Line 15 ensures that the base of the image aligns with the base of the window. The completed window looks as in Fig 6 below.
Fig 6Listing 5-3
active = Truewhile active: for event in pygame.event.get(): if event.type == pygame.QUIT: running = False if event.type == pygame.KEYDOWN: if event.key == pygame.K_LEFT: dragon_rect.x -= KEY_STEPS if event.key == pygame.K_RIGHT: dragon_rect.x += KEY_STEPS if event.key == pygame.K_UP: dragon_rect.y -= KEY_STEPS if event.key == pygame.K_DOWN: dragon_rect.y += KEY_STEPS game_area.fill(YELLOW) game_area.blit(dragon_image, dragon_rect) pygame.display.update()pygame.quit()
Previously we have defined what an event is, but here we shall do a quick recap. An event occurs when an external source interacts with the computer. In our case that could be a mouse button being clicked or a keyboard key being pressed. Whichever of those happens, it is referred to as an event.
An event has one of many types. In line 20 we have a familiar event whose type is pygame.QUIT. At line 22 we have an event whose type is pygame.KEYDOWN.. This occurs whenever a user presses any key on the keyboard - including the keys on the numeric keypad.
The event KEYDOWN also has a property key which identifies which key was pressed to cause the event to occur. The code block from line 22 to line 33 tests the value of the key property to determine whether any one of the arrow keys was pressed.
If the key ← was pressed then the object is to be moved left. By how much is the object to be moved? This is determined by the constant KEY_STEPS which we defined in line6 of Listing 5_1 above. Since this has a value of 20 then the object is to be moved 20 pixels to the left. How this is done is shown in line 24.
Since the object is to be moved to the left the value of dragon_rect.x must be reduced by 20. This is done by -= KEY_STEPS. The actual movement will take place when line 36 is executed.
The same logic applies to the code that spans lines 26 - 33.
Moving an object using arrow keys
Go to the web page Python Programming Events and read the section Keyboard Events. Read the section and try the three exercises provided
In this section we shall look at moving objects using the mouse. There are two ways of doing this: clicking on different parts of the window, or dragging the mouse across the screen. We shall be looking at two event types: MOUSEBUTTONDOWN and MOUSEMOTION.
Listing 6-1
import pygamepygame.init()WIN_WIDTH = 500WIN_HEIGHT = 500YELLOW = (255,255,0)game_area = pygame.display.set_mode((WIN_WIDTH, WIN_HEIGHT))pygame.display.set_caption("Moving with the mouse")
There is nothing new introduced in Listing 6-1 and so we shall proceed to Listing 6-2.
Again you have seen examples of the code in Listing 5-2 which means that there is no need to explain it.
Listing 6-3
active = Truewhile active: for event in pygame.event.get(): if event.type == pygame.QUIT: running = False if event.type == pygame.MOUSEBUTTONDOWN: mouse_x = event.pos[0] mouse_y = event.pos[1] dragon_rect.centerx = mouse_x dragon_rect.centery = mouse_y game_area.fill(YELLOW) if event.type == pygame.MOUSEMOTION and event.buttons[0] == 1: mouse_x = event.pos[0] mouse_y = event.pos[1] dragon_rect.centerx = mouse_x dragon_rect.centery = mouse_y game_area.fill(YELLOW) game_area.blit(dragon_image, dragon_rect) pygame.display.update()pygame.quit()
Lines 21 - 26 deal with the event type MOUSEBUTTONDOWN This event occurs when the user presses the mouse button. I has a property pos which is a tuple. Of this tuple element 0 contains the x-position of where the mouse went down and element 1 contains the y-position. At lines 24 and 25 those values are copied into the centerx and centery porperties of the rectangle
This change of position will take effect once line 36 is executed.
Lines 28 - 33 deal with the MOUSEMOTION event. This event occurs when the moust is moved across the screen. Our code, however, only runs when the mouse is moving across the screen and the left button is pressed. This is shown at line 28. The rest of the code is identical to that of the MOUSEBUTTONDOWN event.
Moving an object using the mouse
Above is a video showing an object being moved around the screen by both mouse clicks and dragging the mouse.
Up to now all movements in our windows were controlled by either the four action keys or by either clicking or dragging the mouse. Here we shall look at movement that is independent of the keyboard or mouse.
Our aim here is to have a ball that moves horizontally across the screen. These movements across the screen will continue until we shut down the program. Also each crossing of the screen is faster than the previous crossing.
On line 1, as well as importing pygame we are also importing the module random. The reason for this is that each time the ball crosses our screen, it will do so at a different height. That height will be determined by a random number generator.
There is nothing new introduced in the rest of the code.
Lines 13 and 14 introduce a new concept - the clock.
A new constant FPS is introduced at line 13. The constant's name is an abbreviation of Frames Per Second.
Line 14 creates a clock object. In listing 7-3 below we will see how this clock affects our program.
Lines 17 - 19 introduce new constants that need some explanation:
BALL_STARTING_VELOCITY holds the value of the initial velocity or speed of the ball. Its value here is 10, indicating that the ball will move 10 pixels in the required direction
BALL_ACCELERATION holds the value of how much the velocity of the ball increases for each crossing. This has a value of 1. This means that the first crossing will be at the rate of 10 pixels, whereas for each iteration of the while loop this will increase by 1. The second iteration will be at the rate of 11 pixels and so forth.
BUFFER_DISTANCE controls the distance to the right of the screen where the ball rests before moving to the left across the screen. Again the ball moves the same distance past the left edge of the screen. This is in order to provide a short timespace between each crossing of the ball. The use of this constant is shown at line 23 where the x position of the ball is set to 100 pixels beyond the right of of the screen's edge.
Listing 7-3
active = Truewhile active: for event in pygame.event.get(): if event.type == pygame.QUIT: active = False gameWindow.fill(WHITE) if ball_rect.x < BUFFER_DISTANCE * -1: ball_rect.y = random.randint(0,WIN_HEIGHT) ball_rect.x = WIN_WIDTH +100 ball_velocity += BALL_ACCELERATION ball_rect.x -= ball_velocity gameWindow.blit(ball_image, ball_rect) pygame.display.update() clock.tick(FPS)pygame.quit()
At line 38 the x value of the ball is tested for being less than -100, i.e. BUFFER_DISTANCE multiplied by -1. This would mean that the ball would be positioned 100 pixels to the left of the screen and that therefore it would have completed a crossing. If this is the case then we need to position it to the right of the screen in preperation for its next crossing. Lines 39 - 41 accomplish this task.
Line 39 creates a random number in the range 0 to the height of the screen, i.e. between 0 and 800. This will ensure the ball will be fired at different heights for each crossing.
Line 40 sets the horizontal position of the ball to its starting position, i.e. 100 pixels to the right of the screen.
Line 41 increases the velocity of the ball by a factor of 1, i.e. the value of the constant BALL_ACCELERATION
The ball is now ready for its next journey acorss the screen.
The journey is controlled by line 42. The value of the x coordinate of the ball rectangle is reduced by the value of the velocity of the ball. This means that it is to be moved to the left. The impression of the moving ball is created by it being moved continuously to the left every time the while loop iterates.
Line 43 actually positions the ball and line 44 updates the display on the screen.
Line 45 makes the movement of the ball be shown at the rate of 60 frames per second.
Finally we are in a position to try out a simple game where a dragon chases a bat but the bat manages to evade the dragon. We achieve this by detecting when the dragon touches the bat but the bat evades it. This evasion is achieved by detecting when the two objects collide with each other. Once this occurs a new position is calculated for the bat and it moves there.
One other feature of this game is that the dragon can be moved either with the keyboard or the mouse.
Listing 1 to Listing 4 contain no new concepts and therefore we shall begin with Listing 5.
active = Truewhile active: for event in pygame.event.get(): if event.type == pygame.QUIT: active = False if event.type == pygame.MOUSEBUTTONDOWN : mouse_x = event.pos[0] mouse_y = event.pos[1] dragon_rect.centerx = mouse_x dragon_rect.centery = mouse_y if event.type == pygame.MOUSEMOTION and event.buttons[0] == 1: mouse_x = event.pos[0] mouse_y = event.pos[1] dragon_rect.centerx = mouse_x dragon_rect.centery = mouse_y
Listing 7-4
                                keys = pygame.key.get_pressed()
                                if keys[pygame.K_LEFT] and dragon_rect.left > 0:
                                    dragon_rect.x -= KEY_SPEED

                                if keys[pygame.K_RIGHT] and dragon_rect.right < WIN_WIDTH:
                                    dragon_rect.x += KEY_SPEED

                                if keys[pygame.K_UP] and dragon_rect.top > 0:
                                    dragon_rect.y -= KEY_SPEED

                                if keys[pygame.K_DOWN] and dragon_rect.bottom < WIN_HEIGHT:
                                    dragon_rect.y += KEY_SPEED
The rectangle has a function colliderect() that can detect if any two rectangles touch each other, or in other words, if they collide.
In line 53 the colliderect() function of the dragon rectangle is passed the bat rectangle as an argument. The function then can determine if the two rectangles overlap. If they do then a value of True is returned, otherwise a value of false is returned.
If a value of True is returned the the code at lines 54 and 55 is executed. A random number in the range 0 - 728 is generated for both the top and left corners of the bat rectangle.
The program code now passes to the final section of the loop where the adjustments made